It's already a box. How hard could it be to make it something you could live in? That's what a lot of people automatically think (and what I thought for years) when it comes to shipping containers. What I learned from actually building one taught me that it would have been easier and cheaper to build the same size house without the container.
Engineering and Foundation
When you build a normal stick built house, there are standardized ways of doing just about everything. Everybody in the building
trades knows what they are and more or less how things are done. The foundation is a good example. A concrete slab of certain
thickness in the middle and footers that are a certain thickness under the load bearing walls. You dig out the ground, build
the forms and then the plumber comes and runs pipes, followed by pouring the concrete. Simple and easy, or at least, repetitive.
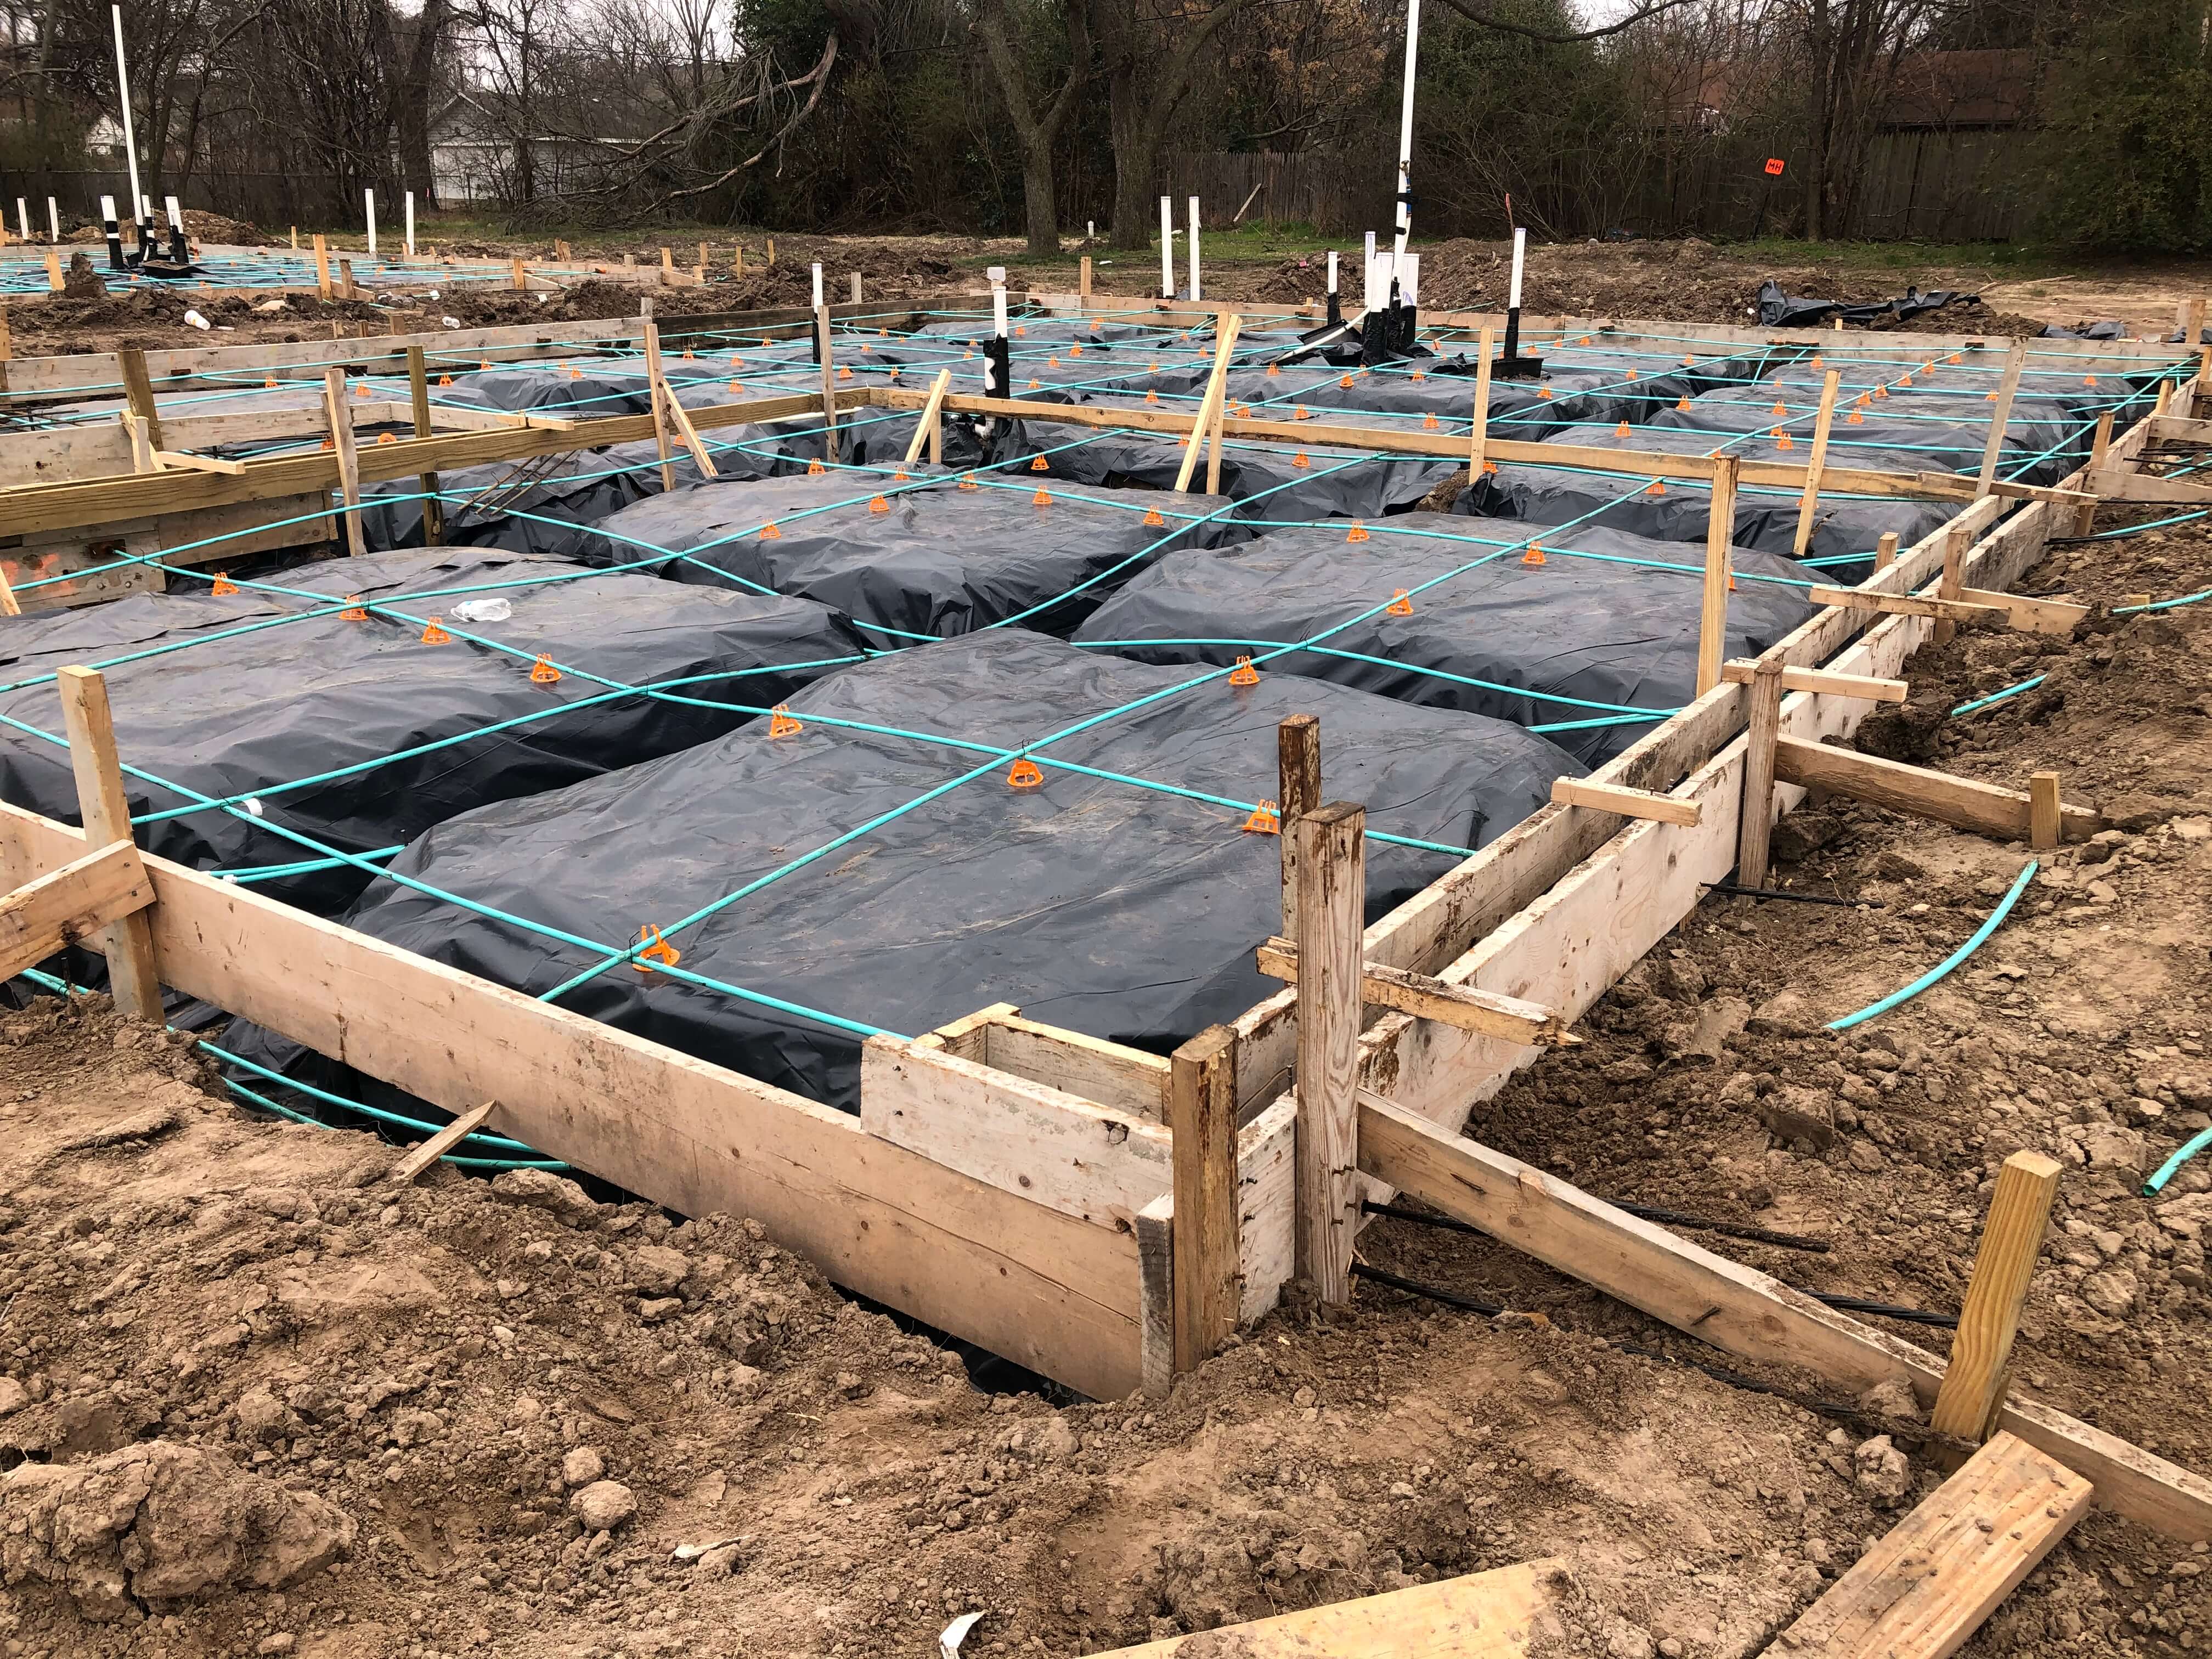
The trouble with pouring a slab foundation for a container house comes when you are ready to drop the container on top of it. You've got all these PVC pipes sticking up out of the slab, and you've got a crane holding the box up in the air. You drop that box on top of the slab and the 1" thick plywood floor of the container is going to smash all your PVC pipes. I guess you could possibly cut out the plywood before lifting the box onto your foundation, but what if one of the metal crossmembers hits a PVC pipe? Same result. You would have to have somebody riding inside the box and directing the crane by radio (hint: not safe).
What I concluded is that it would be better to build all the plumbing after mounting the box to the foundation, and that means I needed a crawl space. Initially I wanted to use piers as my foundation, since that would be relatively cheap and give the plumber space to work, but the city planning office said no way (for aesthetic reasons).
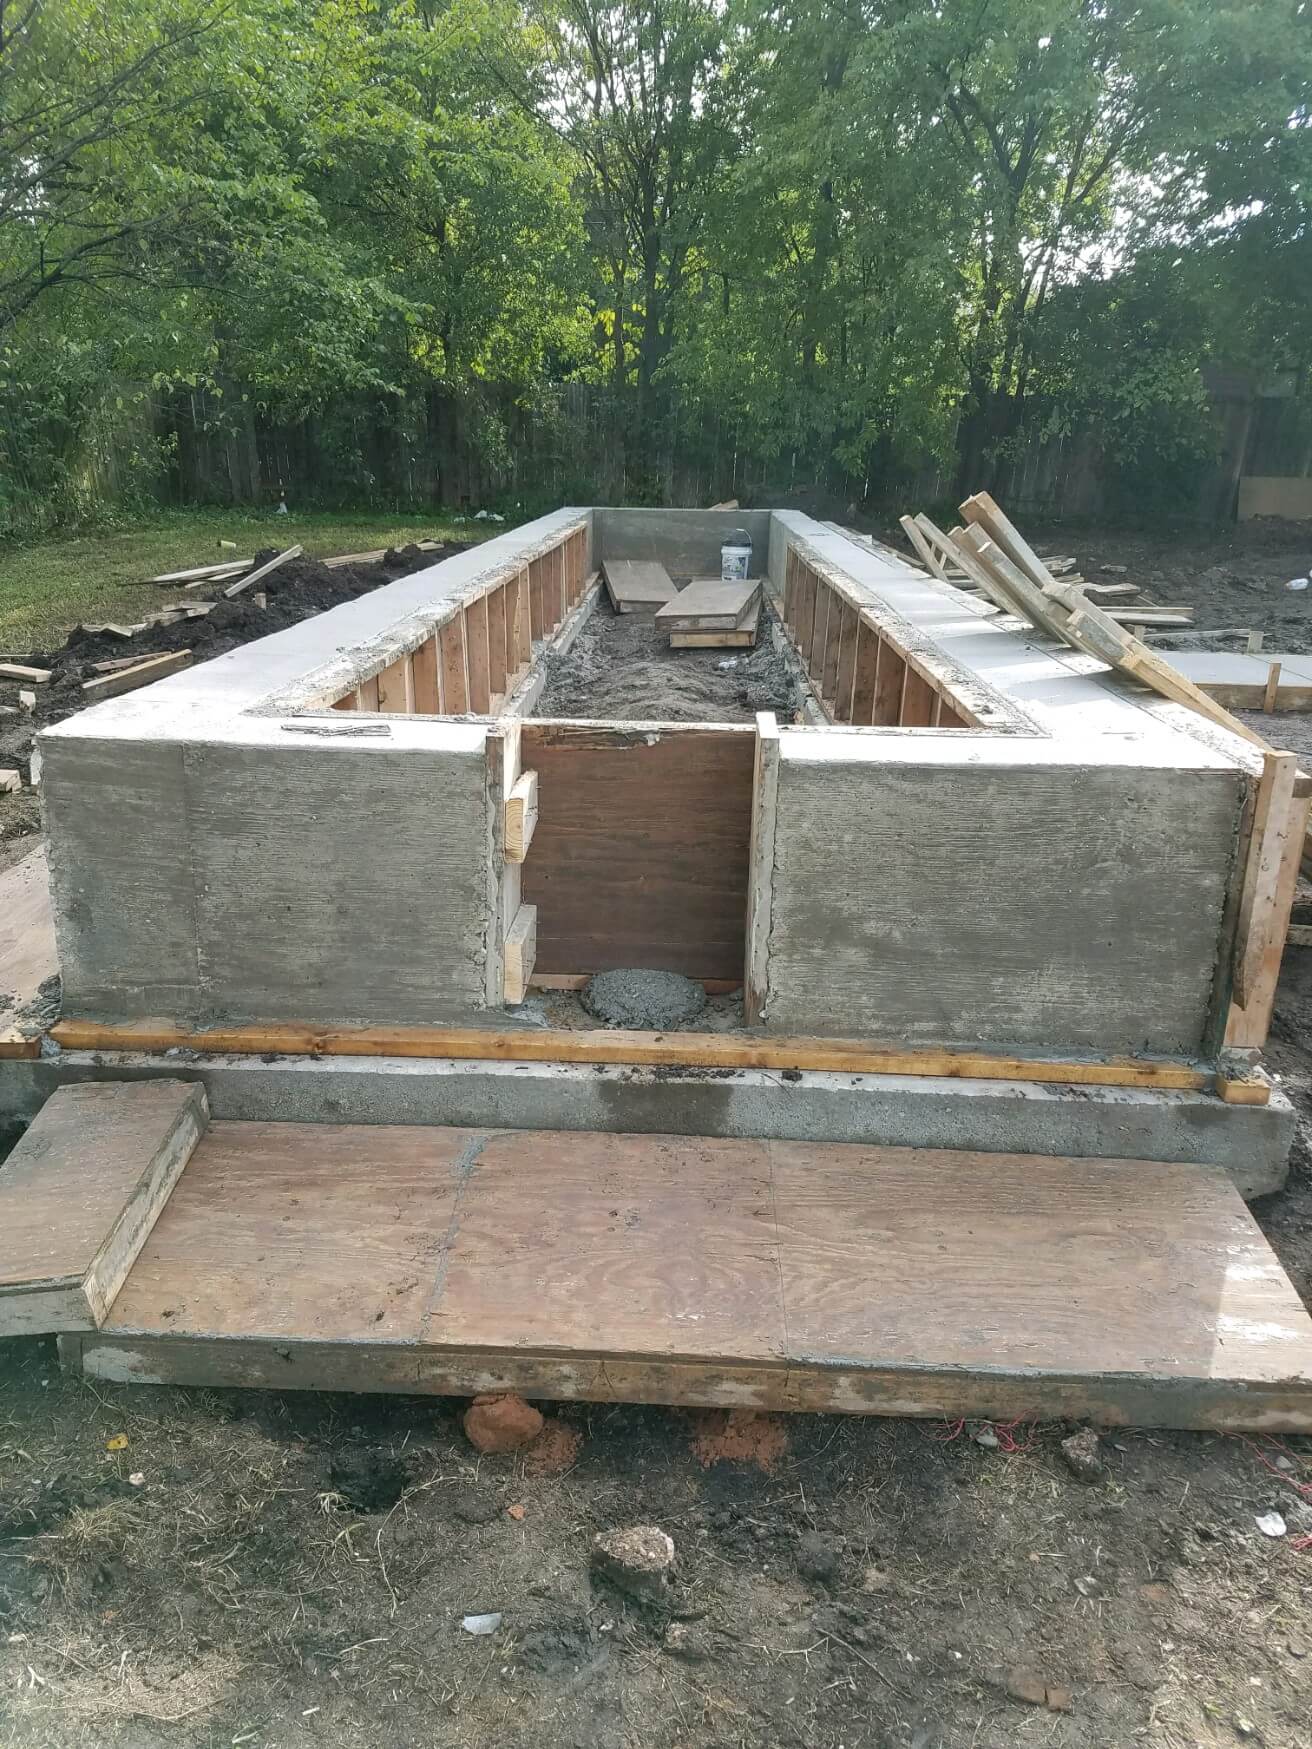
What I wound up with is something called a grade beam. Essentially it was a 18-24" high concrete wall around the perimeter of my container that would hold it up but also provide space to work underneath the box. This of course would be entirely custom, so I had to get a licensed structural engineer to draw up the plans ($800), and the concrete work was going to cost far more than a slab. It came in at $17,000.
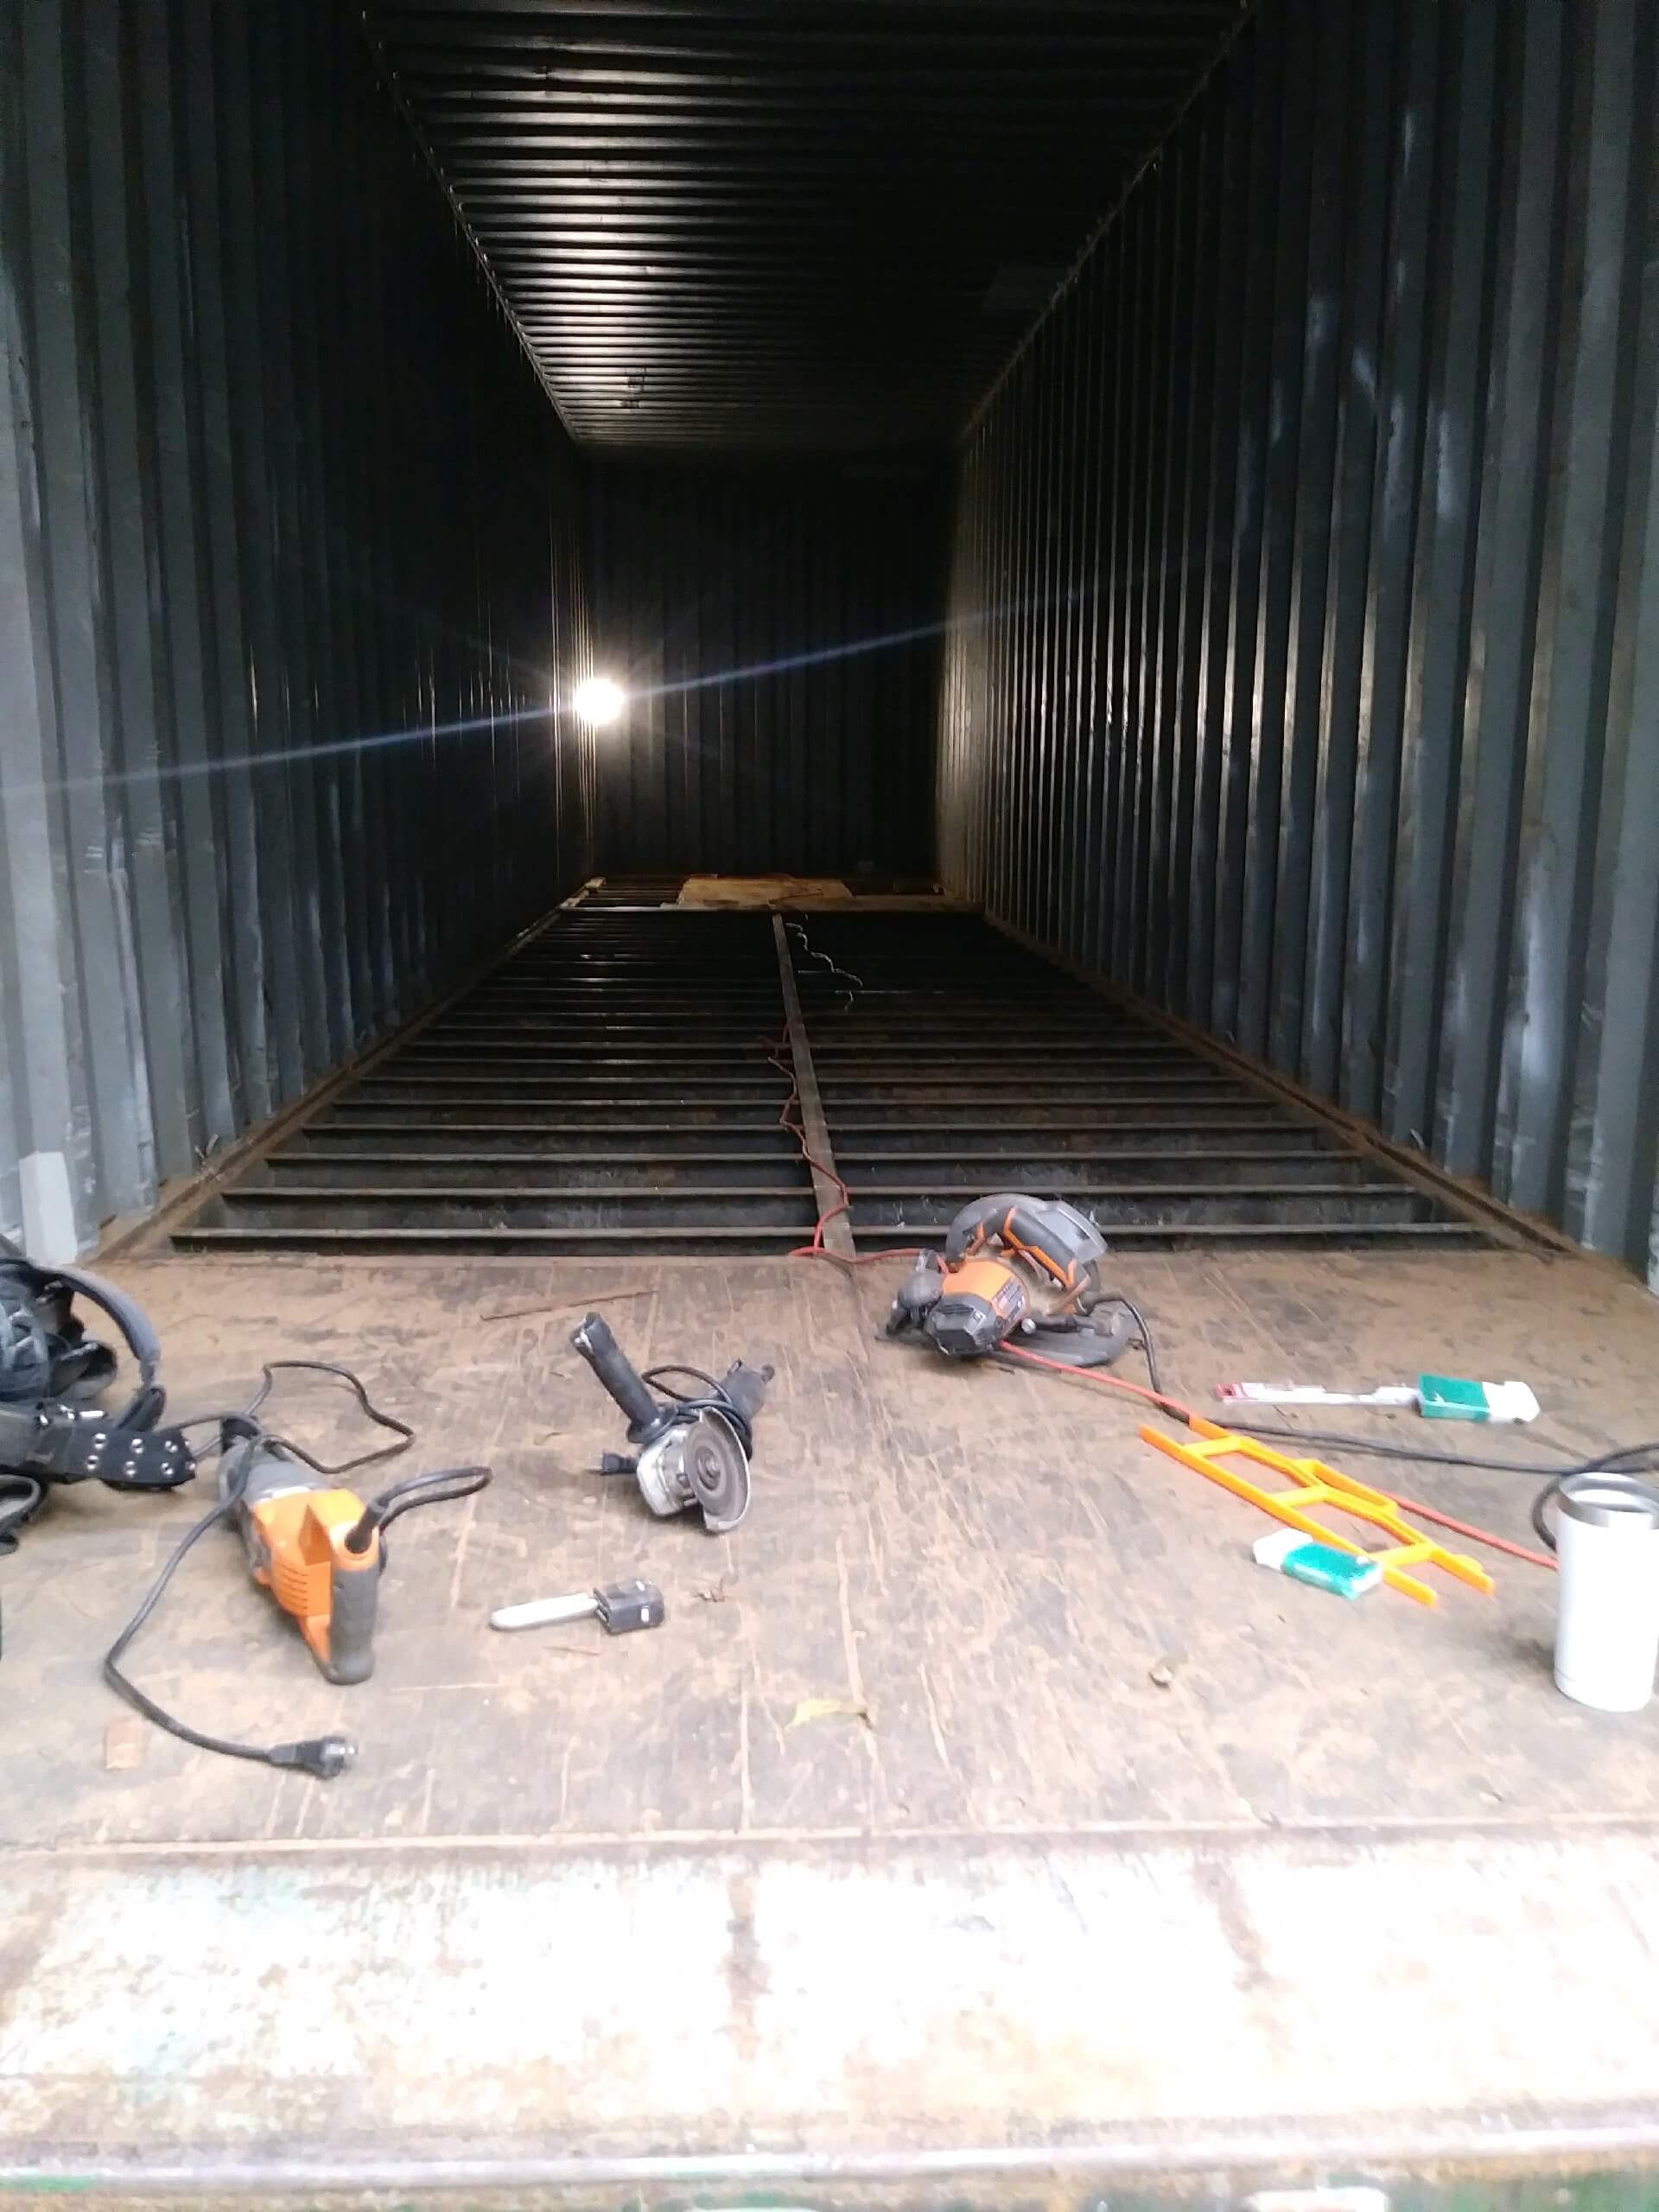
Removing the plywood
If you read up on containers on the internet you'll find out quickly that they are built with thick (I think it was 1 1/2")
floor made of marine grade hardwood plywood, which is also soaked through with pestacides to keep the critters at bay while
these boxes sit in terminals, ships, trains, and loading docks while they travel the world loaded with electronics, food, or
whatever they happen to be shipping. Because of the
health risk of God knows what carcinogens might be infused into this floor, you are probably going to want to remove it
before doing any construction, and replace it with a double layer of 3/4" plywood from Home Depot. That's the standard type of
subfloor to put into any house that's not on a slab (note-- extra expense). Let's talk about about the demo of that plywood
for a second.
Remember I said it was HARDWOOD. This is not the same stuff as what you pick up at Home Depot. Expect to burn through about a dozen
or two sawzall blades to chop it all out. Then after you have gotten the majority of it out, you have to turn to the parts that
are left because they are bolted down to the steel cross members. Burn through another dozen blades chopping bolts to get the rest
out. I think we spent 3 days of two guys working full time to remove all the plywood and bolts ($$$ extra expense).
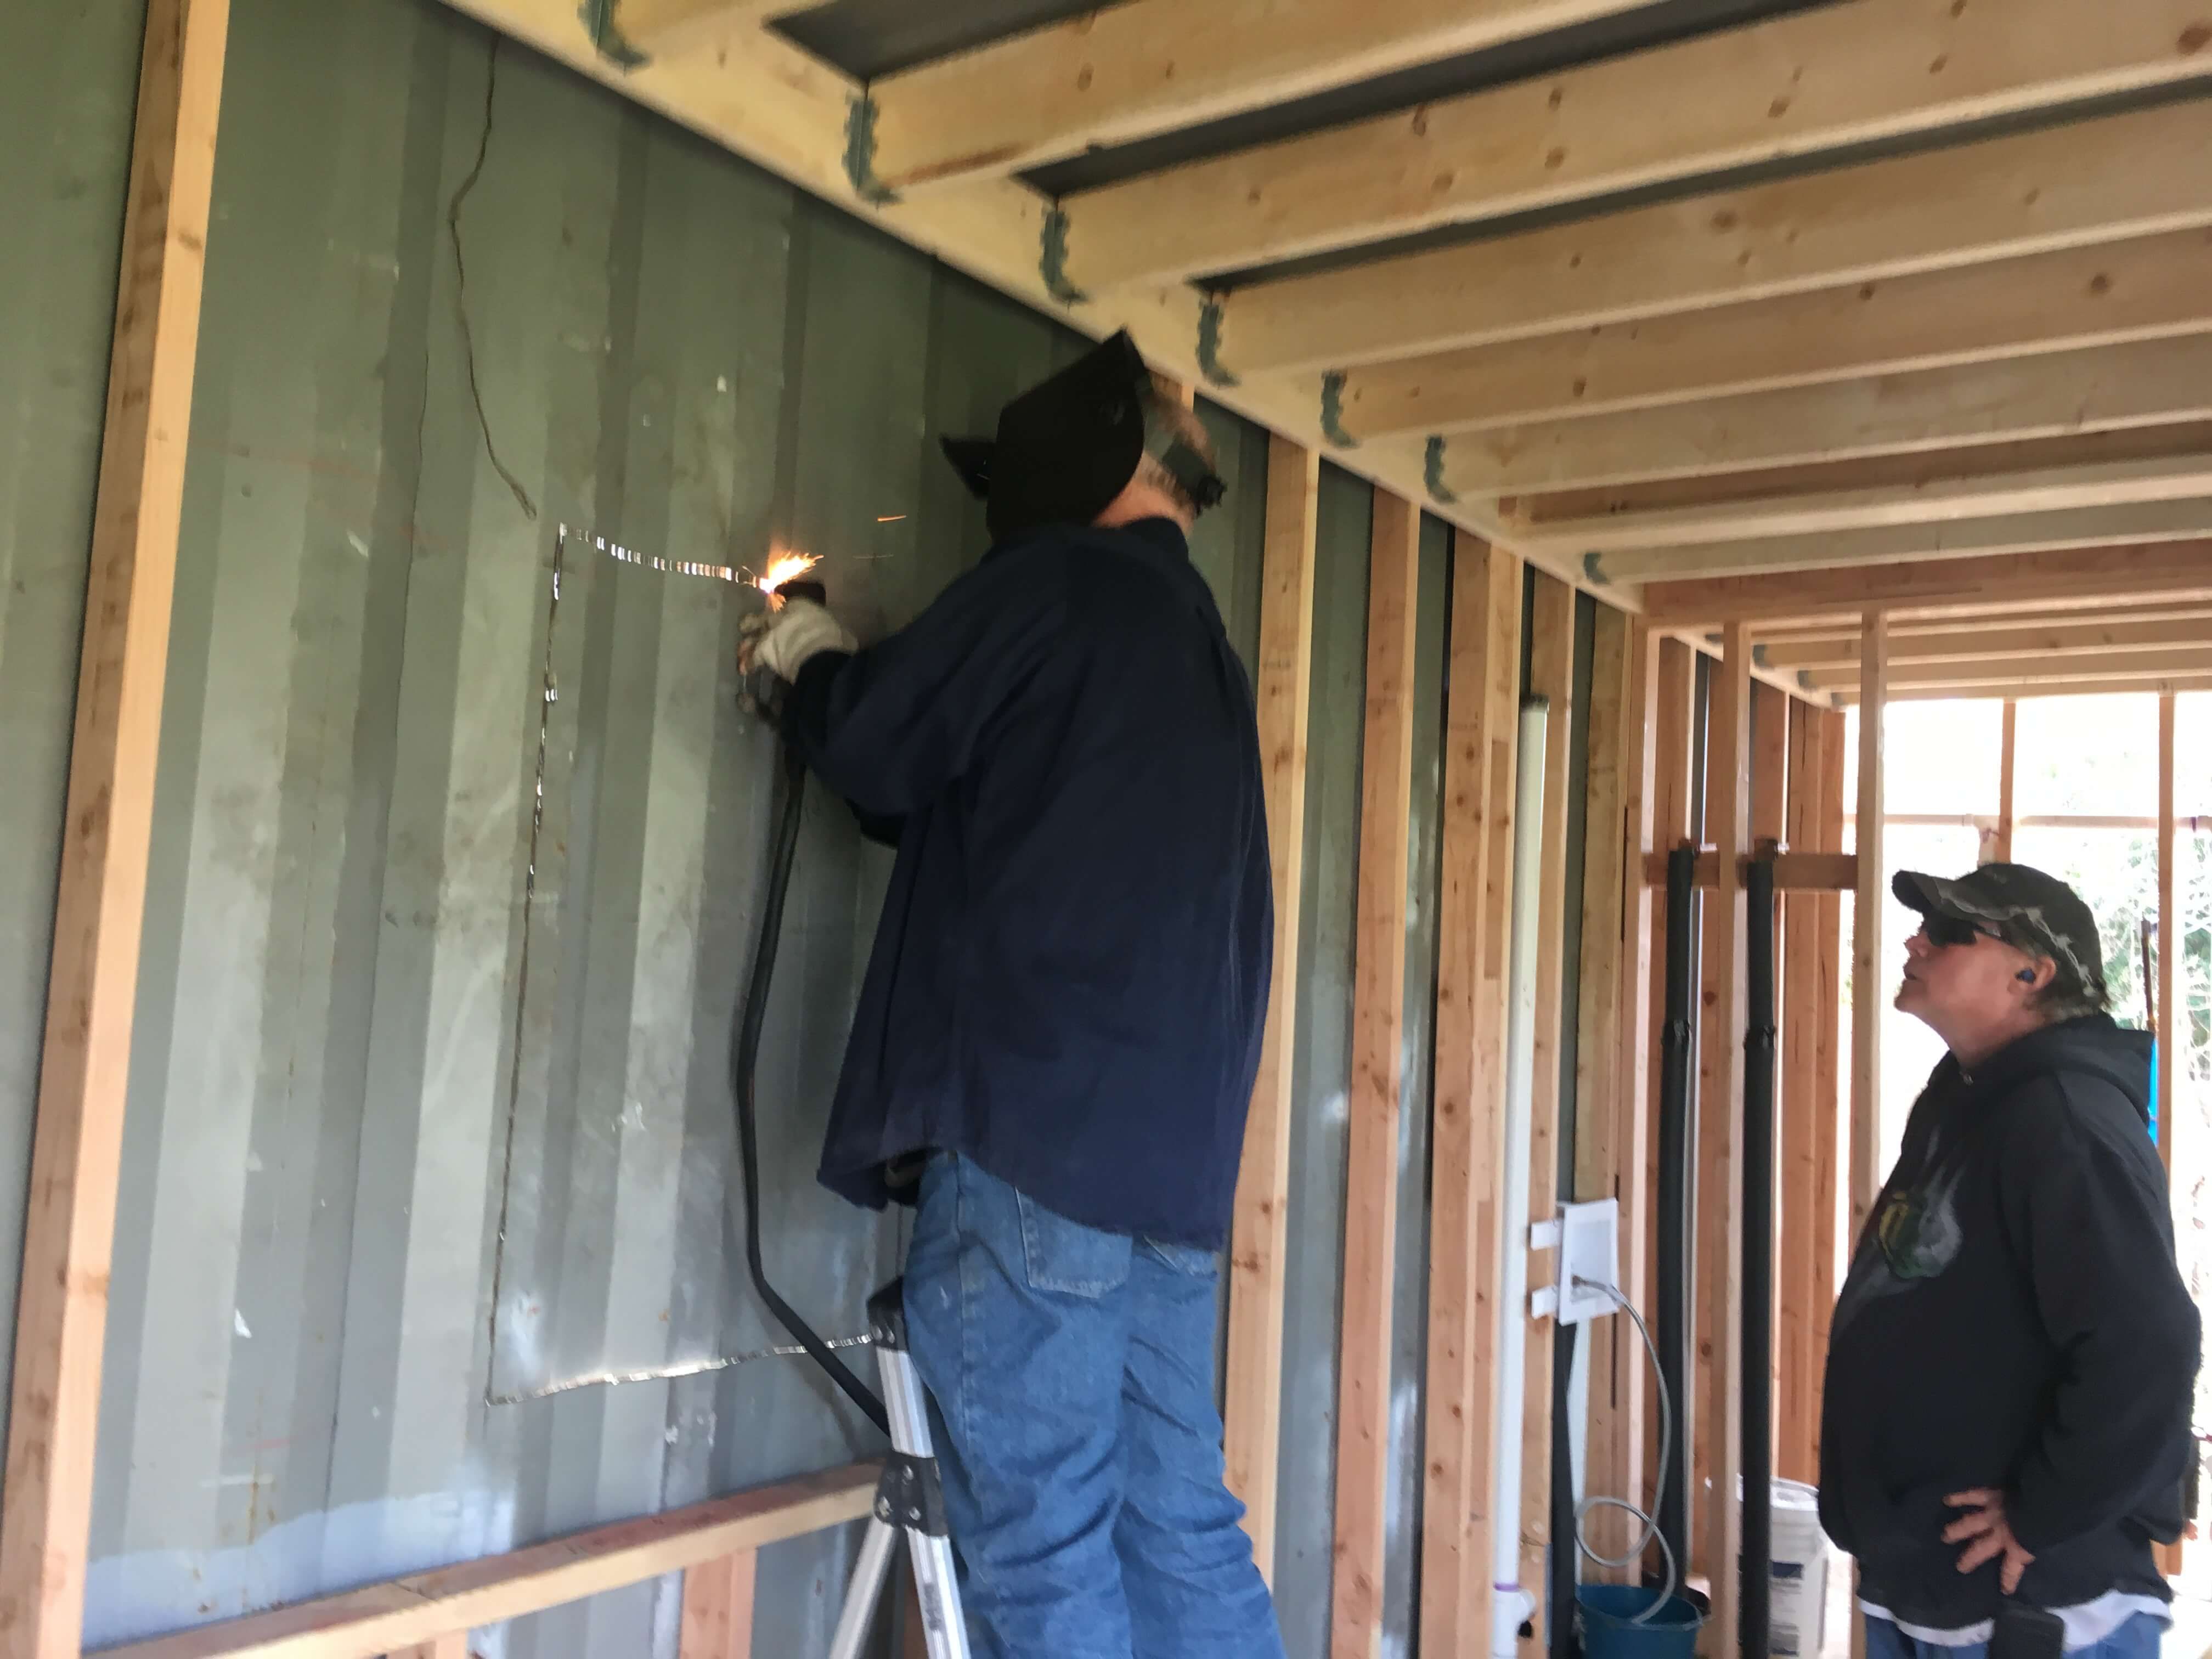
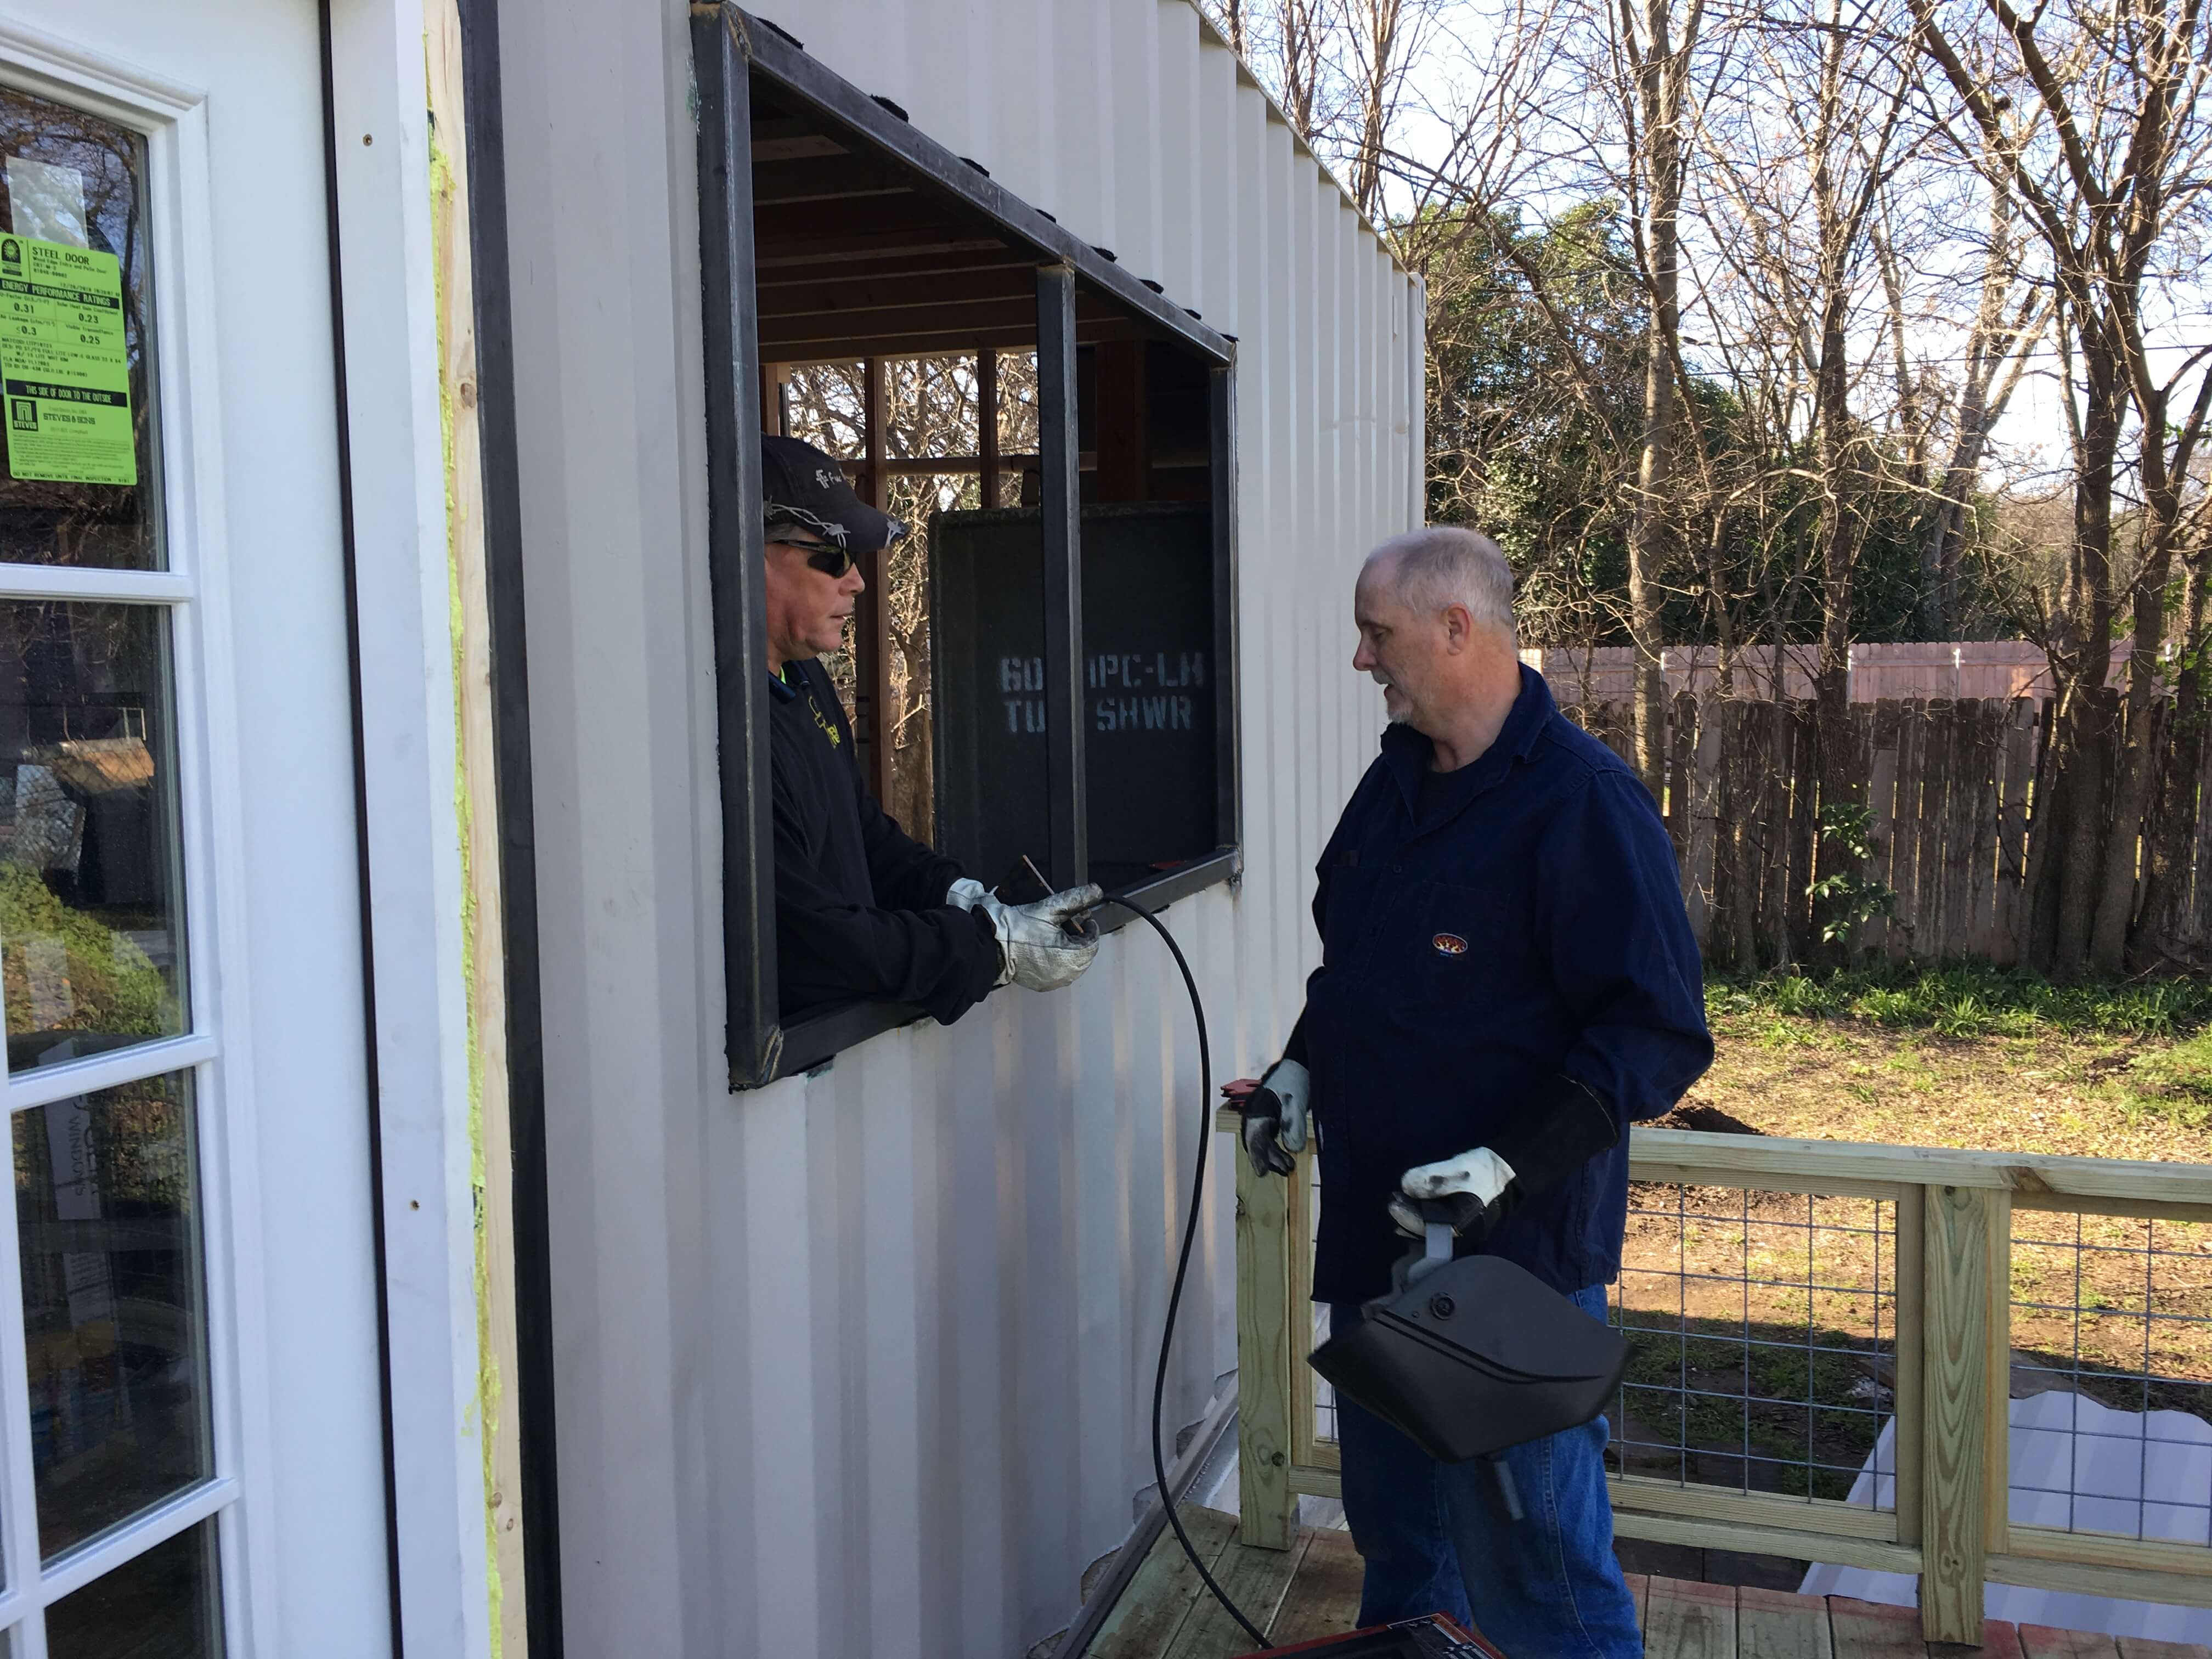
Plasma cutting the walls
Normally, if you are building a stick-built house, when you build the walls you will frame the windows as part of the
process of framing the walls. It's relatively easy-- after all you're cutting pieces of softwood 2x4s and nailing them
together. When it comes to containers, you are still going to have to do all this framing, however there's an extra step,
which is to cut a window sized hole in the corrugated metal side of the box. Remember-- this isn't tin or alumninum. This is
a special marine grade steel box designed to protect millions of dollars worth of cargo across dozens of trips over the ocean,
all while keeping the contents safe and dry. We tried cutting it with a sawzall, which was an abject failure. Tried an angle grinder,
which would have taken maybe a half a day to cut each window. We finally settled on using a plasma cutter. So keep in mind the
extra expense of buying one of these, along with the time and labor cost of cutting holes in metal that you wouldn't have to deal
with otherwise. Oh, and don't handle the scrap pieces of metal without gloves, the edges are very sharp.
Support the box after you cut
Realize that cutting holes in the sides of your box will weaken the structure. Yes, the box is being supported by the concrete
foundation-- but it's being supported on the corners. The horizontal beam that runs along the bottom edge of the box may begin
to sag, especially in the area where the door opening is (it's the biggest opening). Think of the sides of a container as being
similar to a suspension bridge.
The beam along the top of the wall helps by adding strength to the beam along the bottom, which is carrying the weight of the floor
and everything in the box. The corrugated metal is what connects the two.
You have to choose between two options for dealing with this. Option #1 is probably better, but more work. You can weld vertical reinforcements between the top and bottom beam to add structural strength back to the box. Option #2 is the quick and dirty one-- place metal shims between the lower beam and the concrete of the foundation. I tried to do a lot of thinking and planning for my container house ahead of time, but this is one of the things I just completely missed until the time of construction.
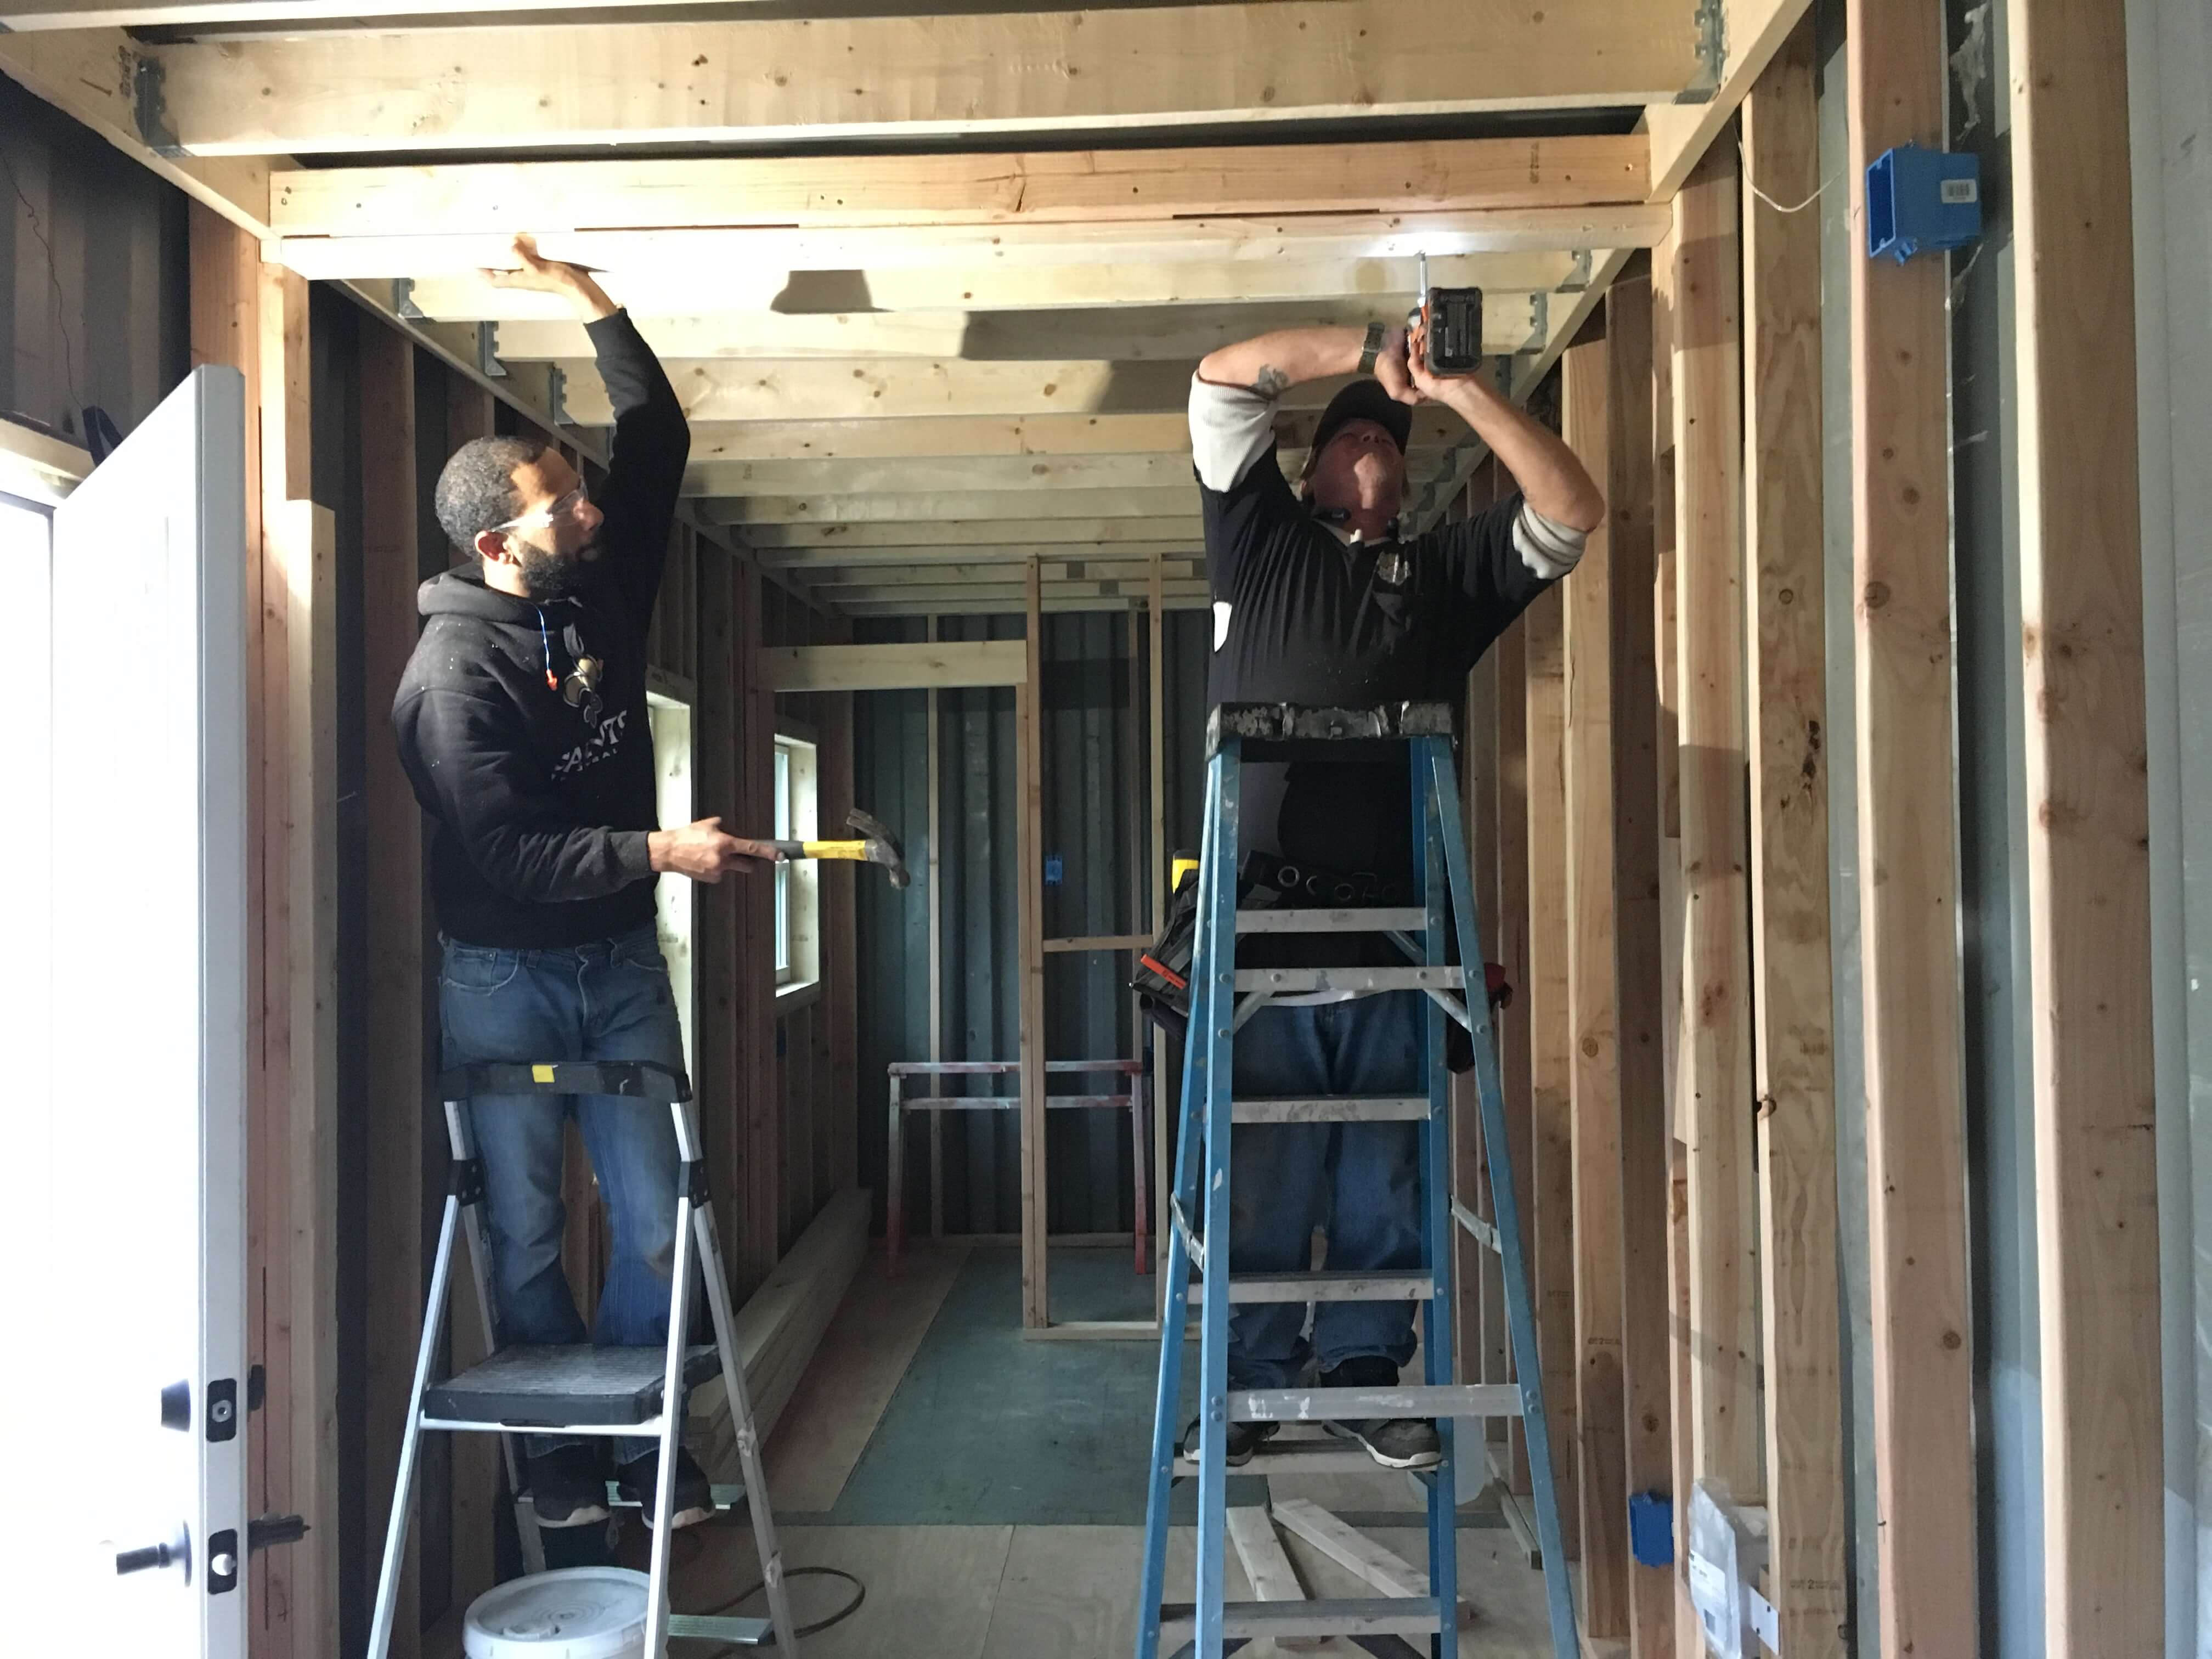
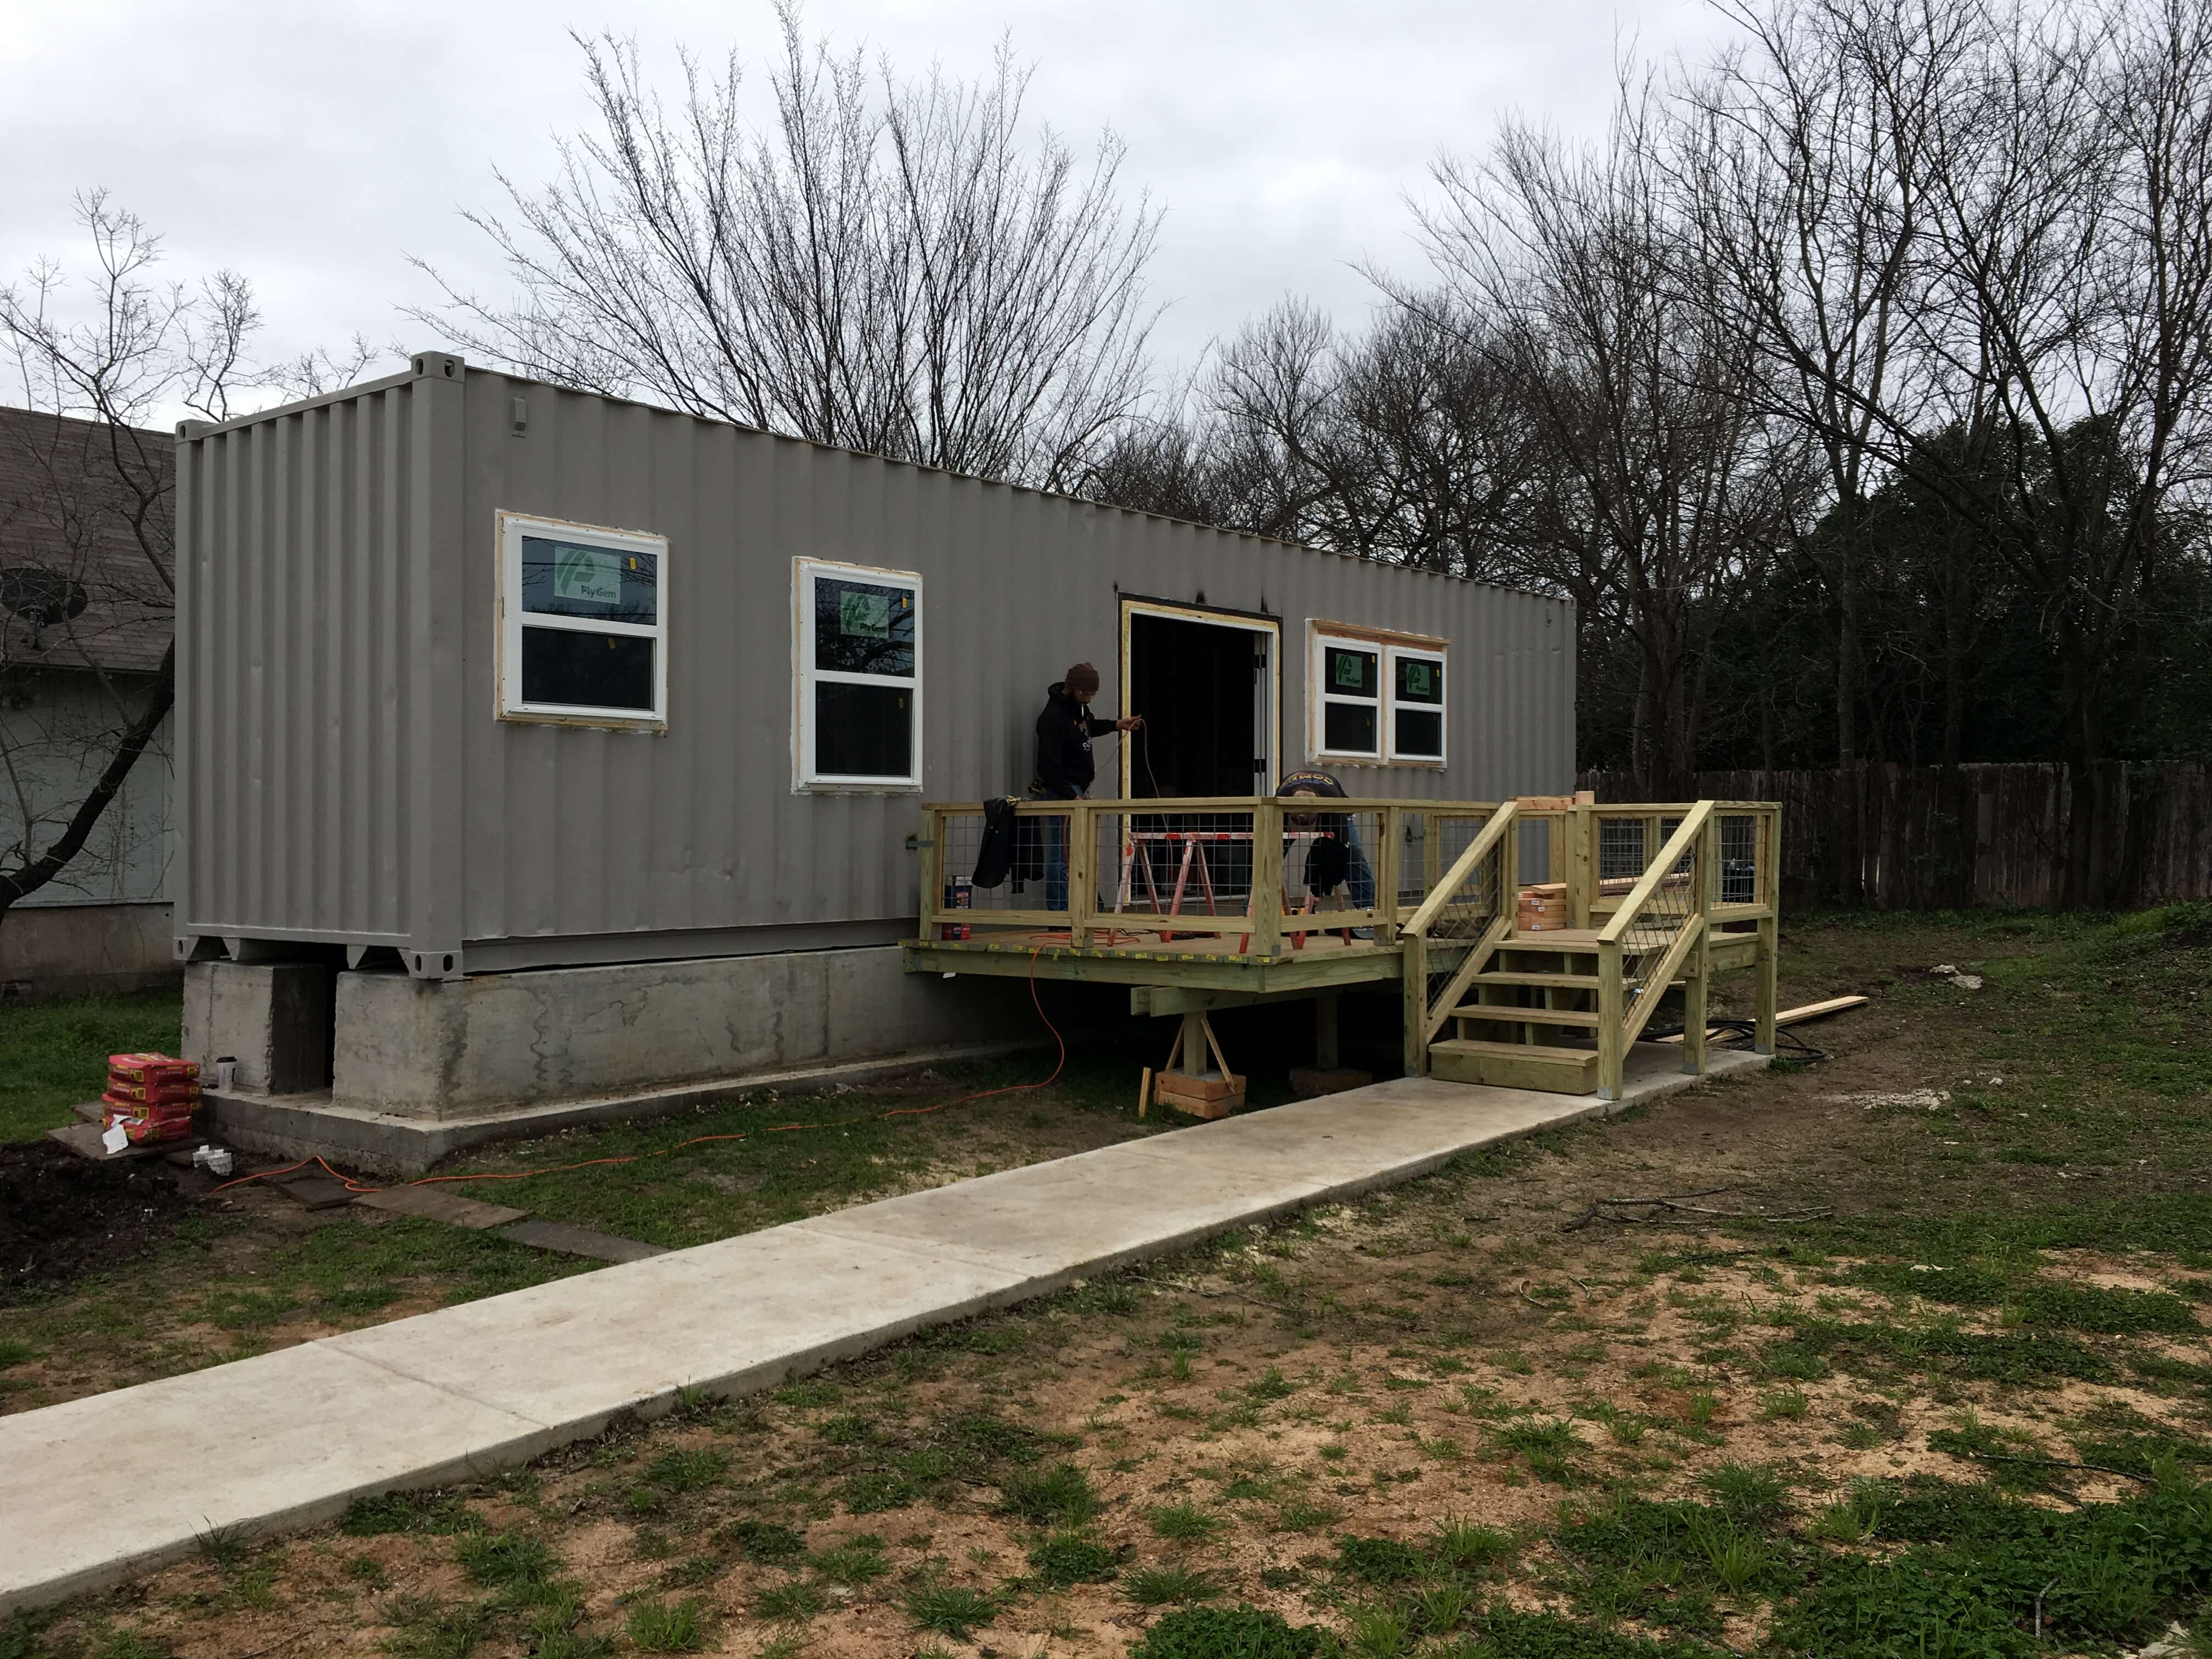
Framing
Now that you've got your box set on the foundation, new subfloor installed, and holes cut for windows and doors, you are ready
for what would have been step one if you were building a normal house: framing the walls. It may seem like framing would be totally
unnecessary. After all, you already have walls! It's a box! However, you still need a place to run wires and pipes, somewhere
to put insulation, and something to screw sheetrock onto. So far you've had to do a bunch of extra work compared to a normal stick
house and still don't get to save any effort on this step.
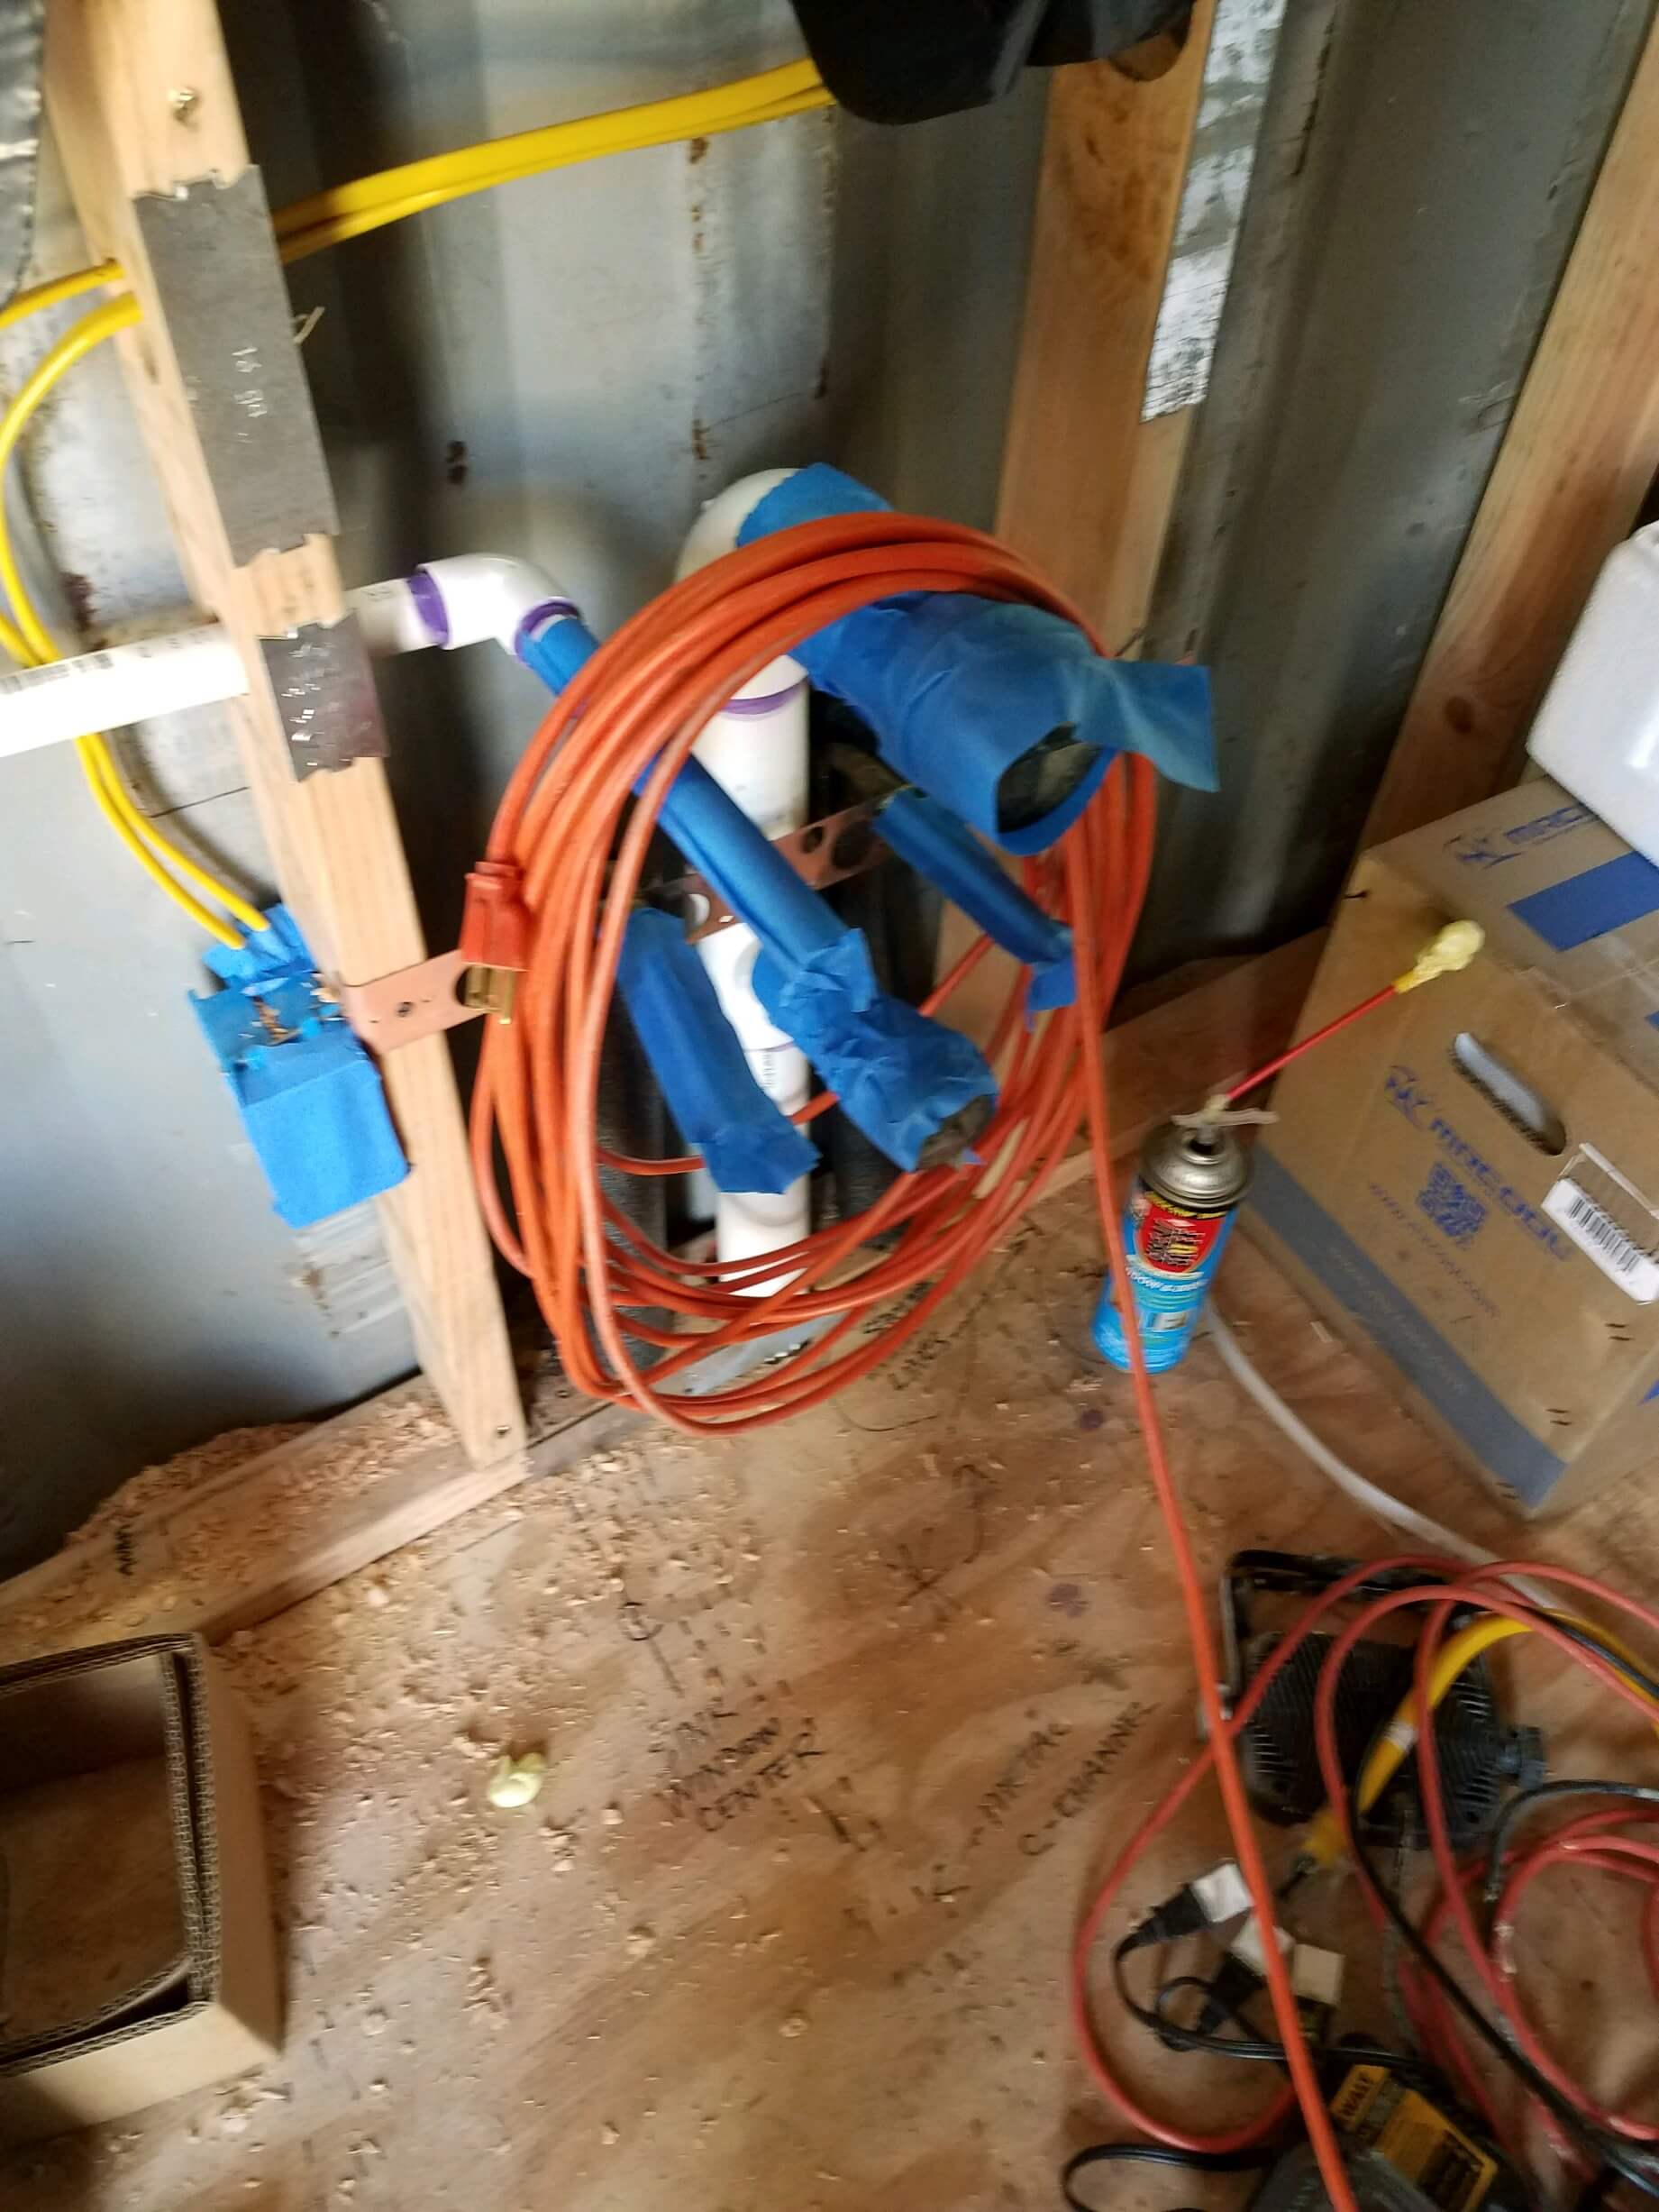
Wires, pipes, HVAC
The electrical and plumbing rough ins are pretty much identical as what you would do for a normal build. You do have some more
penetrations through the metal walls and roof for things like vents and wires coming from the breaker box.
Windows, doors, and keeping rain out
The corrugated shape of the metal walls is what gives it so much strength, but also makes it very difficult to seal the rain out
once you install windows and doors. This is where a welder would come in handy again. The best thing would be to weld a plate onto
the top of the window opening, so that any water that comes along will drip onto the plate and flow towards the outside of the
house. Make sure it's galvanized or at least painted to prevent rust, and make sure to let it slope a little towards the outside.
If you don't go with the metal plate idea, you are going to have to find a way to seal the top of the window from rain seeping in. Since the corrugated metal is not a flat surface, you are going to have a very, very hard time doing this. That's one reason that building a second roof with a large overhang becomes pretty important (more extra work!). Rain will hit the roof before it hits the top of the window.
The roof can't stop all rain, of course, especially in Texas where we have monsoon level storms instead of showers. Rain will go sideways on a regular basis. You will have to cut some wood to follow the contours of the corrugated, and then place that on top of the window trim. Since this kind of carpentry is extremely difficult, don't be surprised when it does not fit like a glove. Get the cuts as precise as a you can, and then just go to town with a caulking gun. Then... hope for the best.
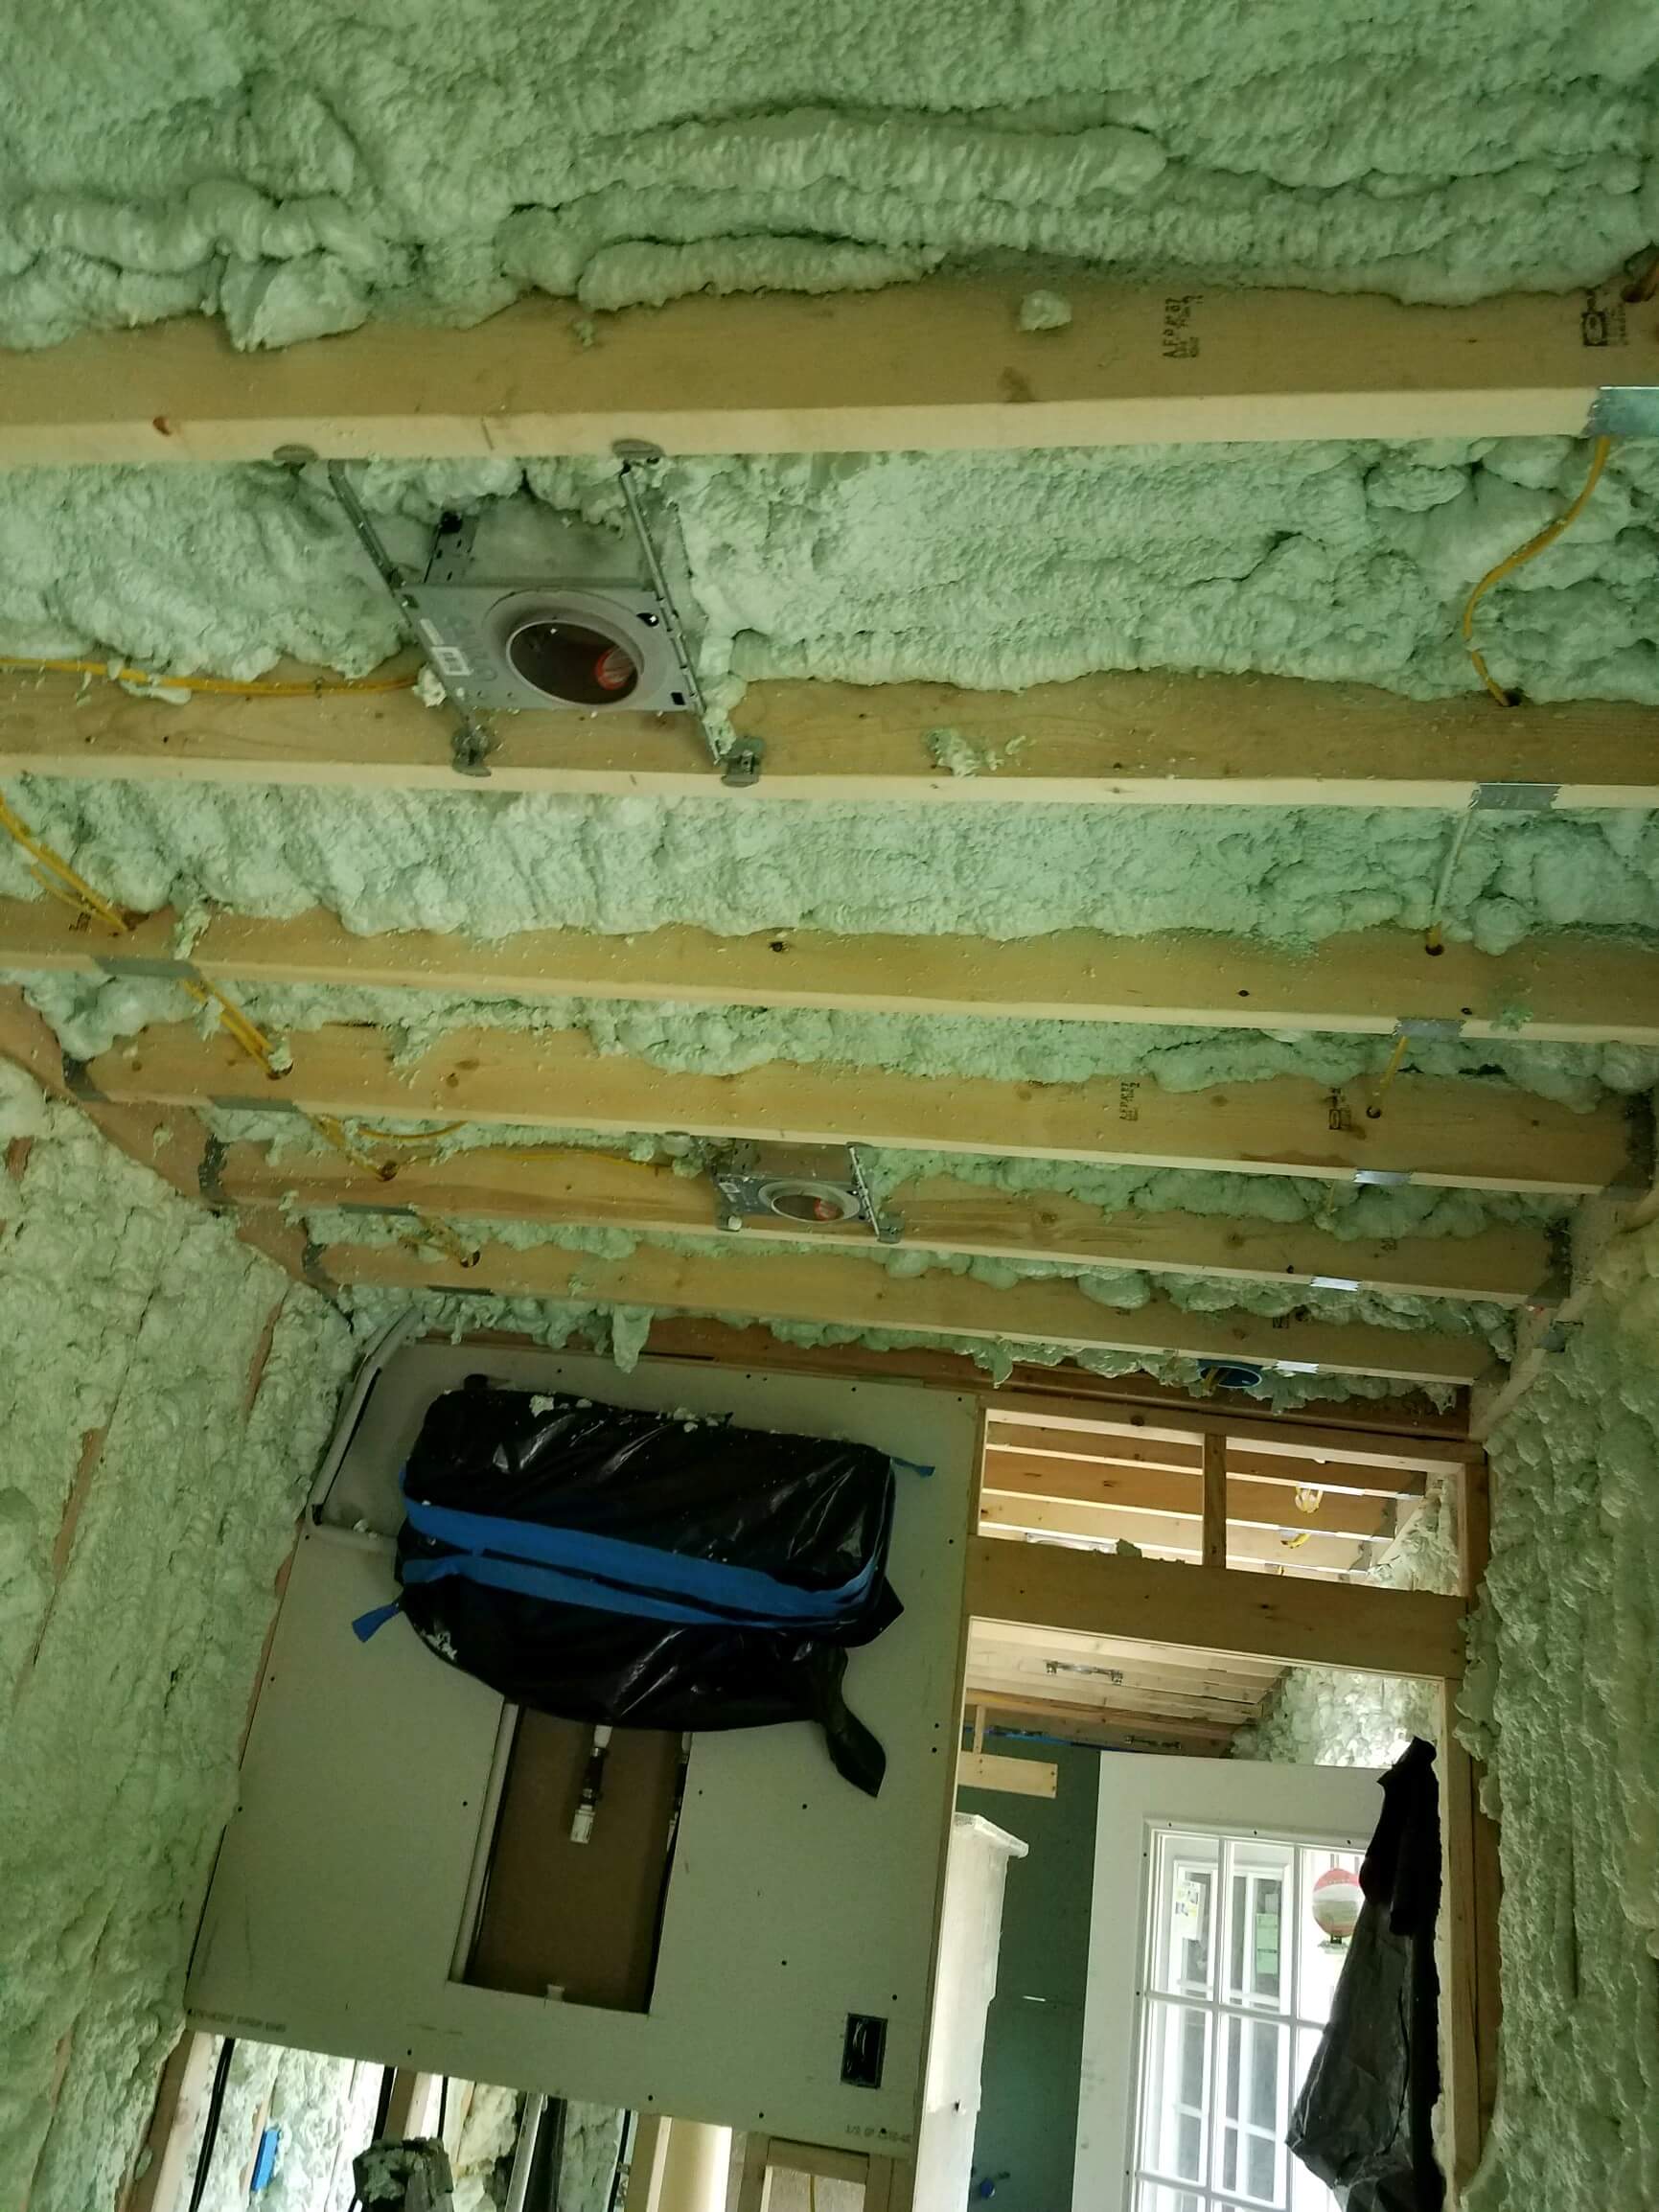
Insulation
Stick built houses are able to use fiberglass insulation which is relatively cheap and easy to install. With containers, the
outside walls are metal, which means they will form condensation. Condensation leads to puddles, mold, and nasty, rotten wood and
rotten sheetrock. The way you have of preventing this is by using spray foam insulation, which costs several times what fiberglass does.
If you do a perfect job of eliminating any
air gaps between the foam and the metal you won't get condensation. This goes for the walls and ceiling, as well as the
floor (the subfloor is plywood and won't form condensation, but most building codes require the floor to be insulated).
There is a portion of the
floor that will be metal, by the way. It's the end of the box opposite the container doors, and it's a big bulkhead built into
the floor that (I think) is used to attach the container to a truck. This is a major area of condensation in the winter. When
it's cold underneath your box and warm inside it, this hunk of metal will be collecting major puddles even if it is covered in
flooring materials like vinyl. I had to spray foam all over this metal section (under the box) in order to solve the problem.
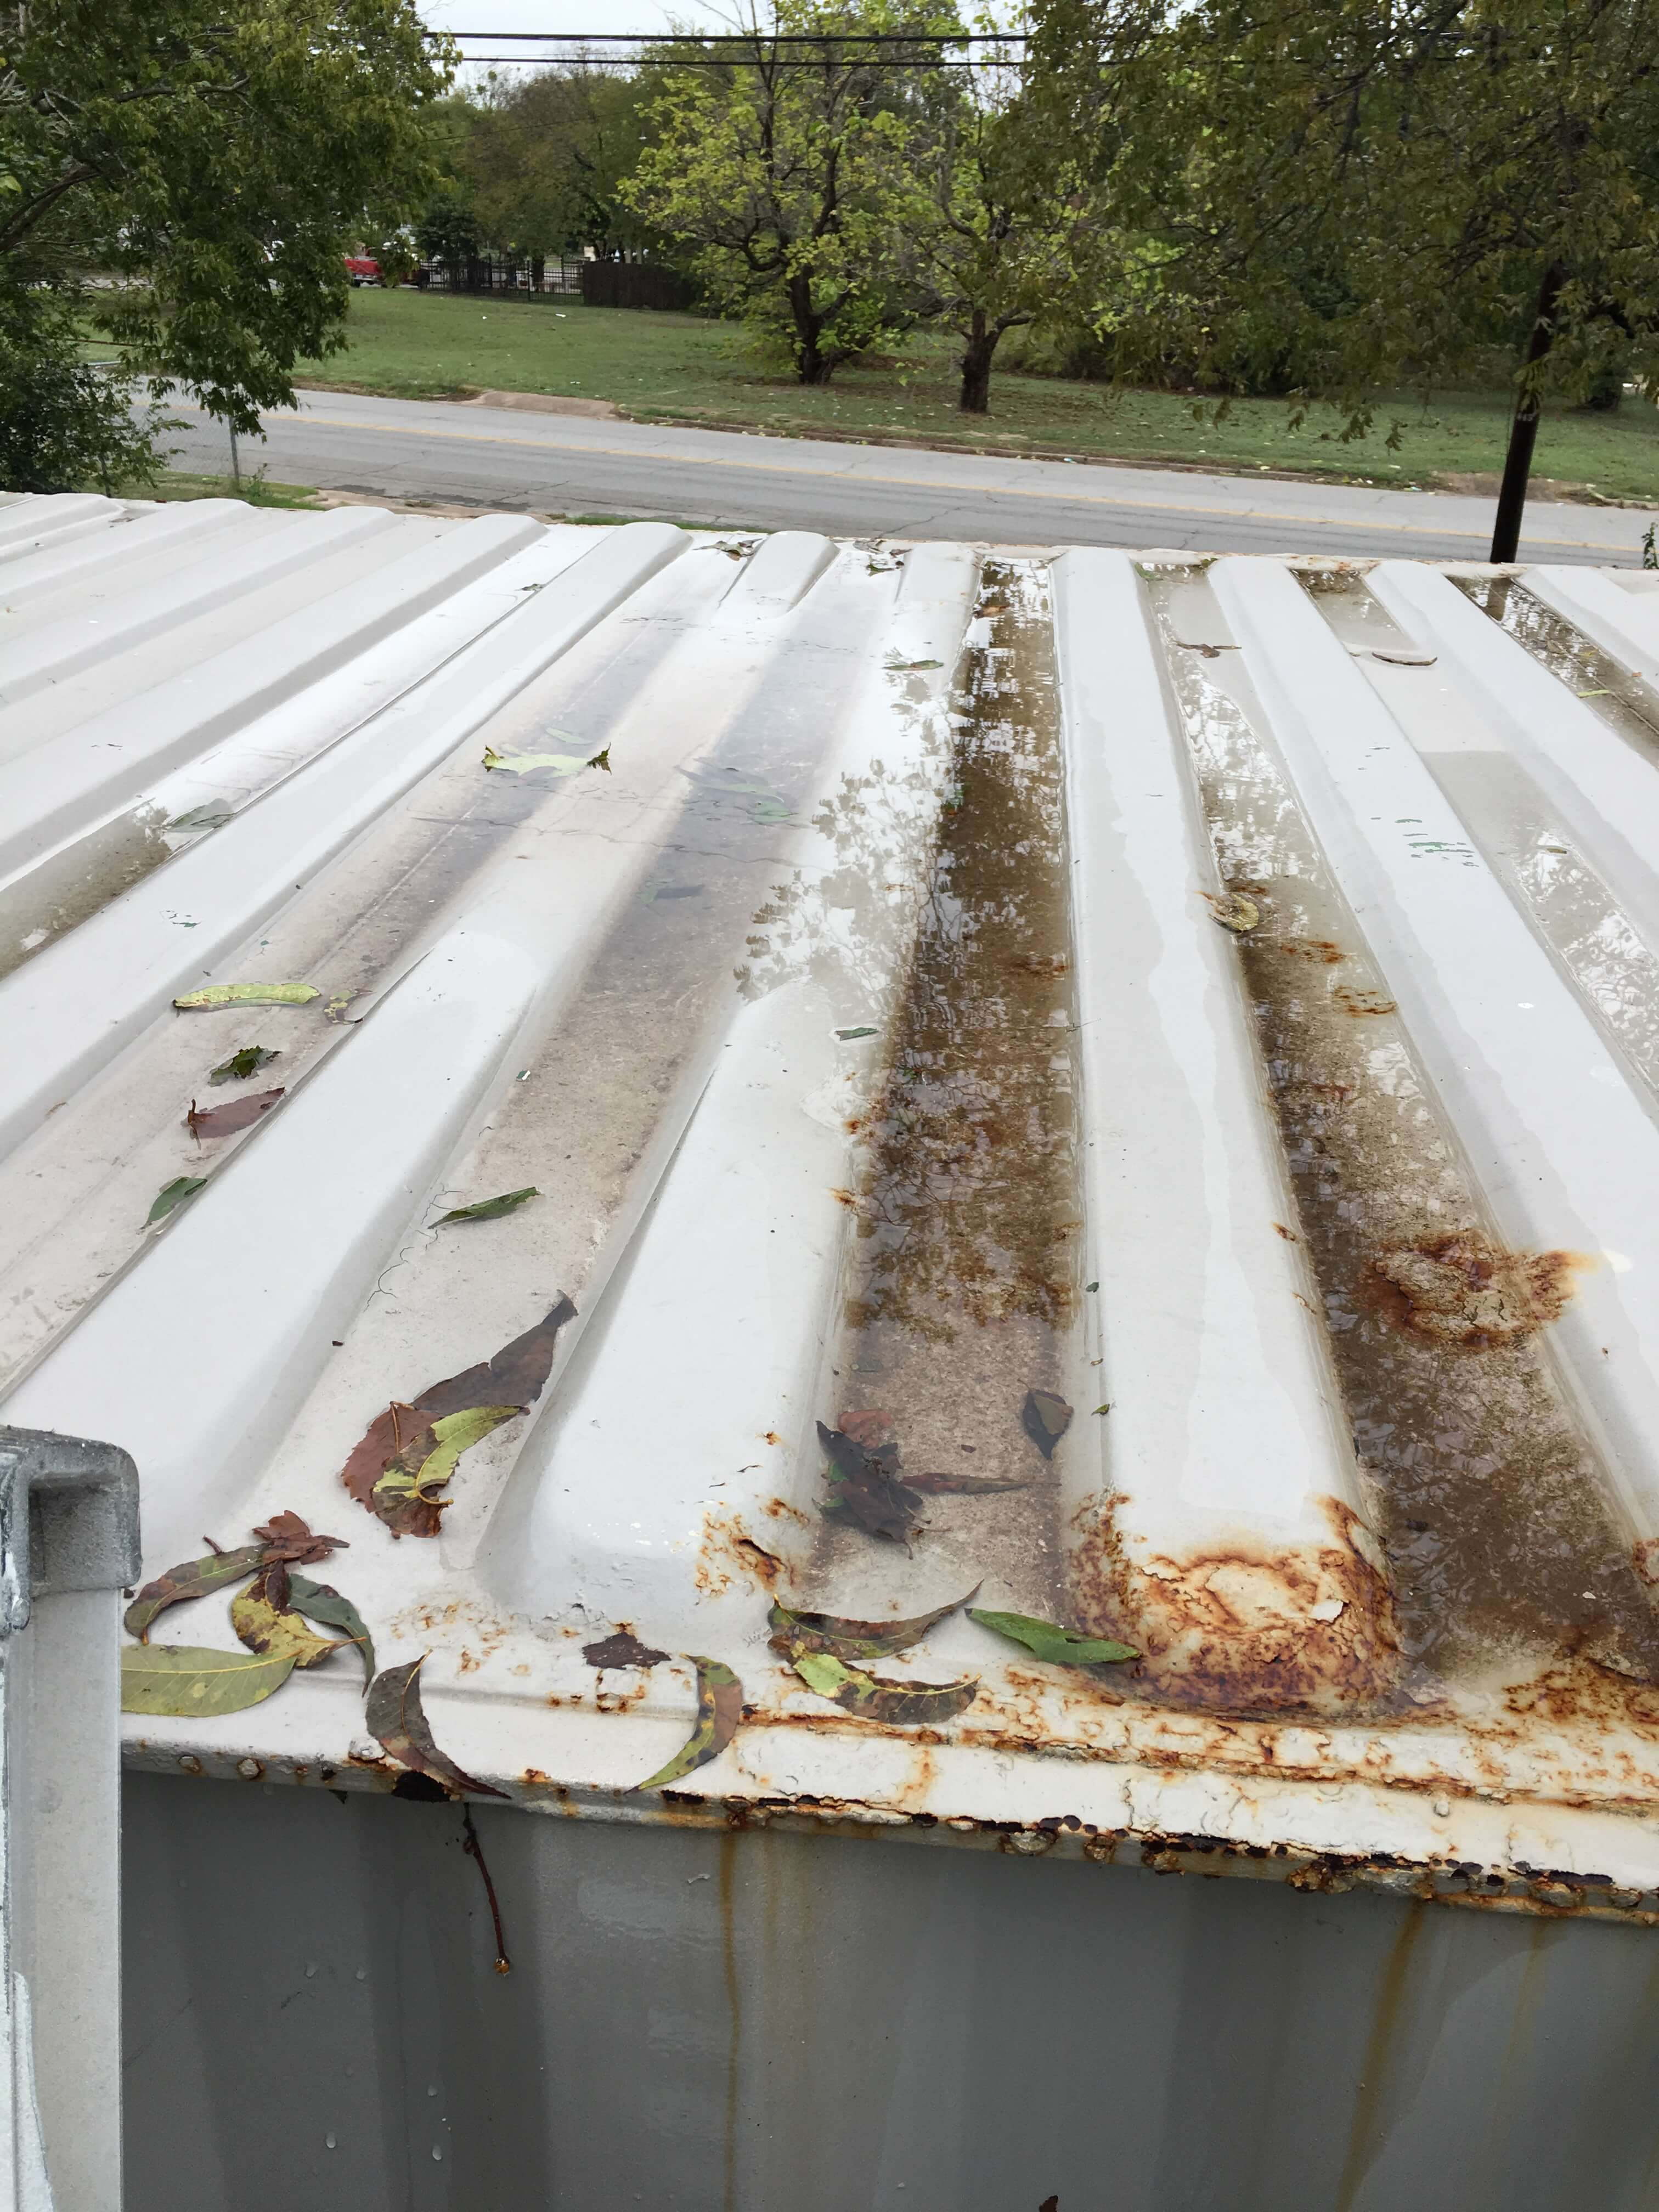
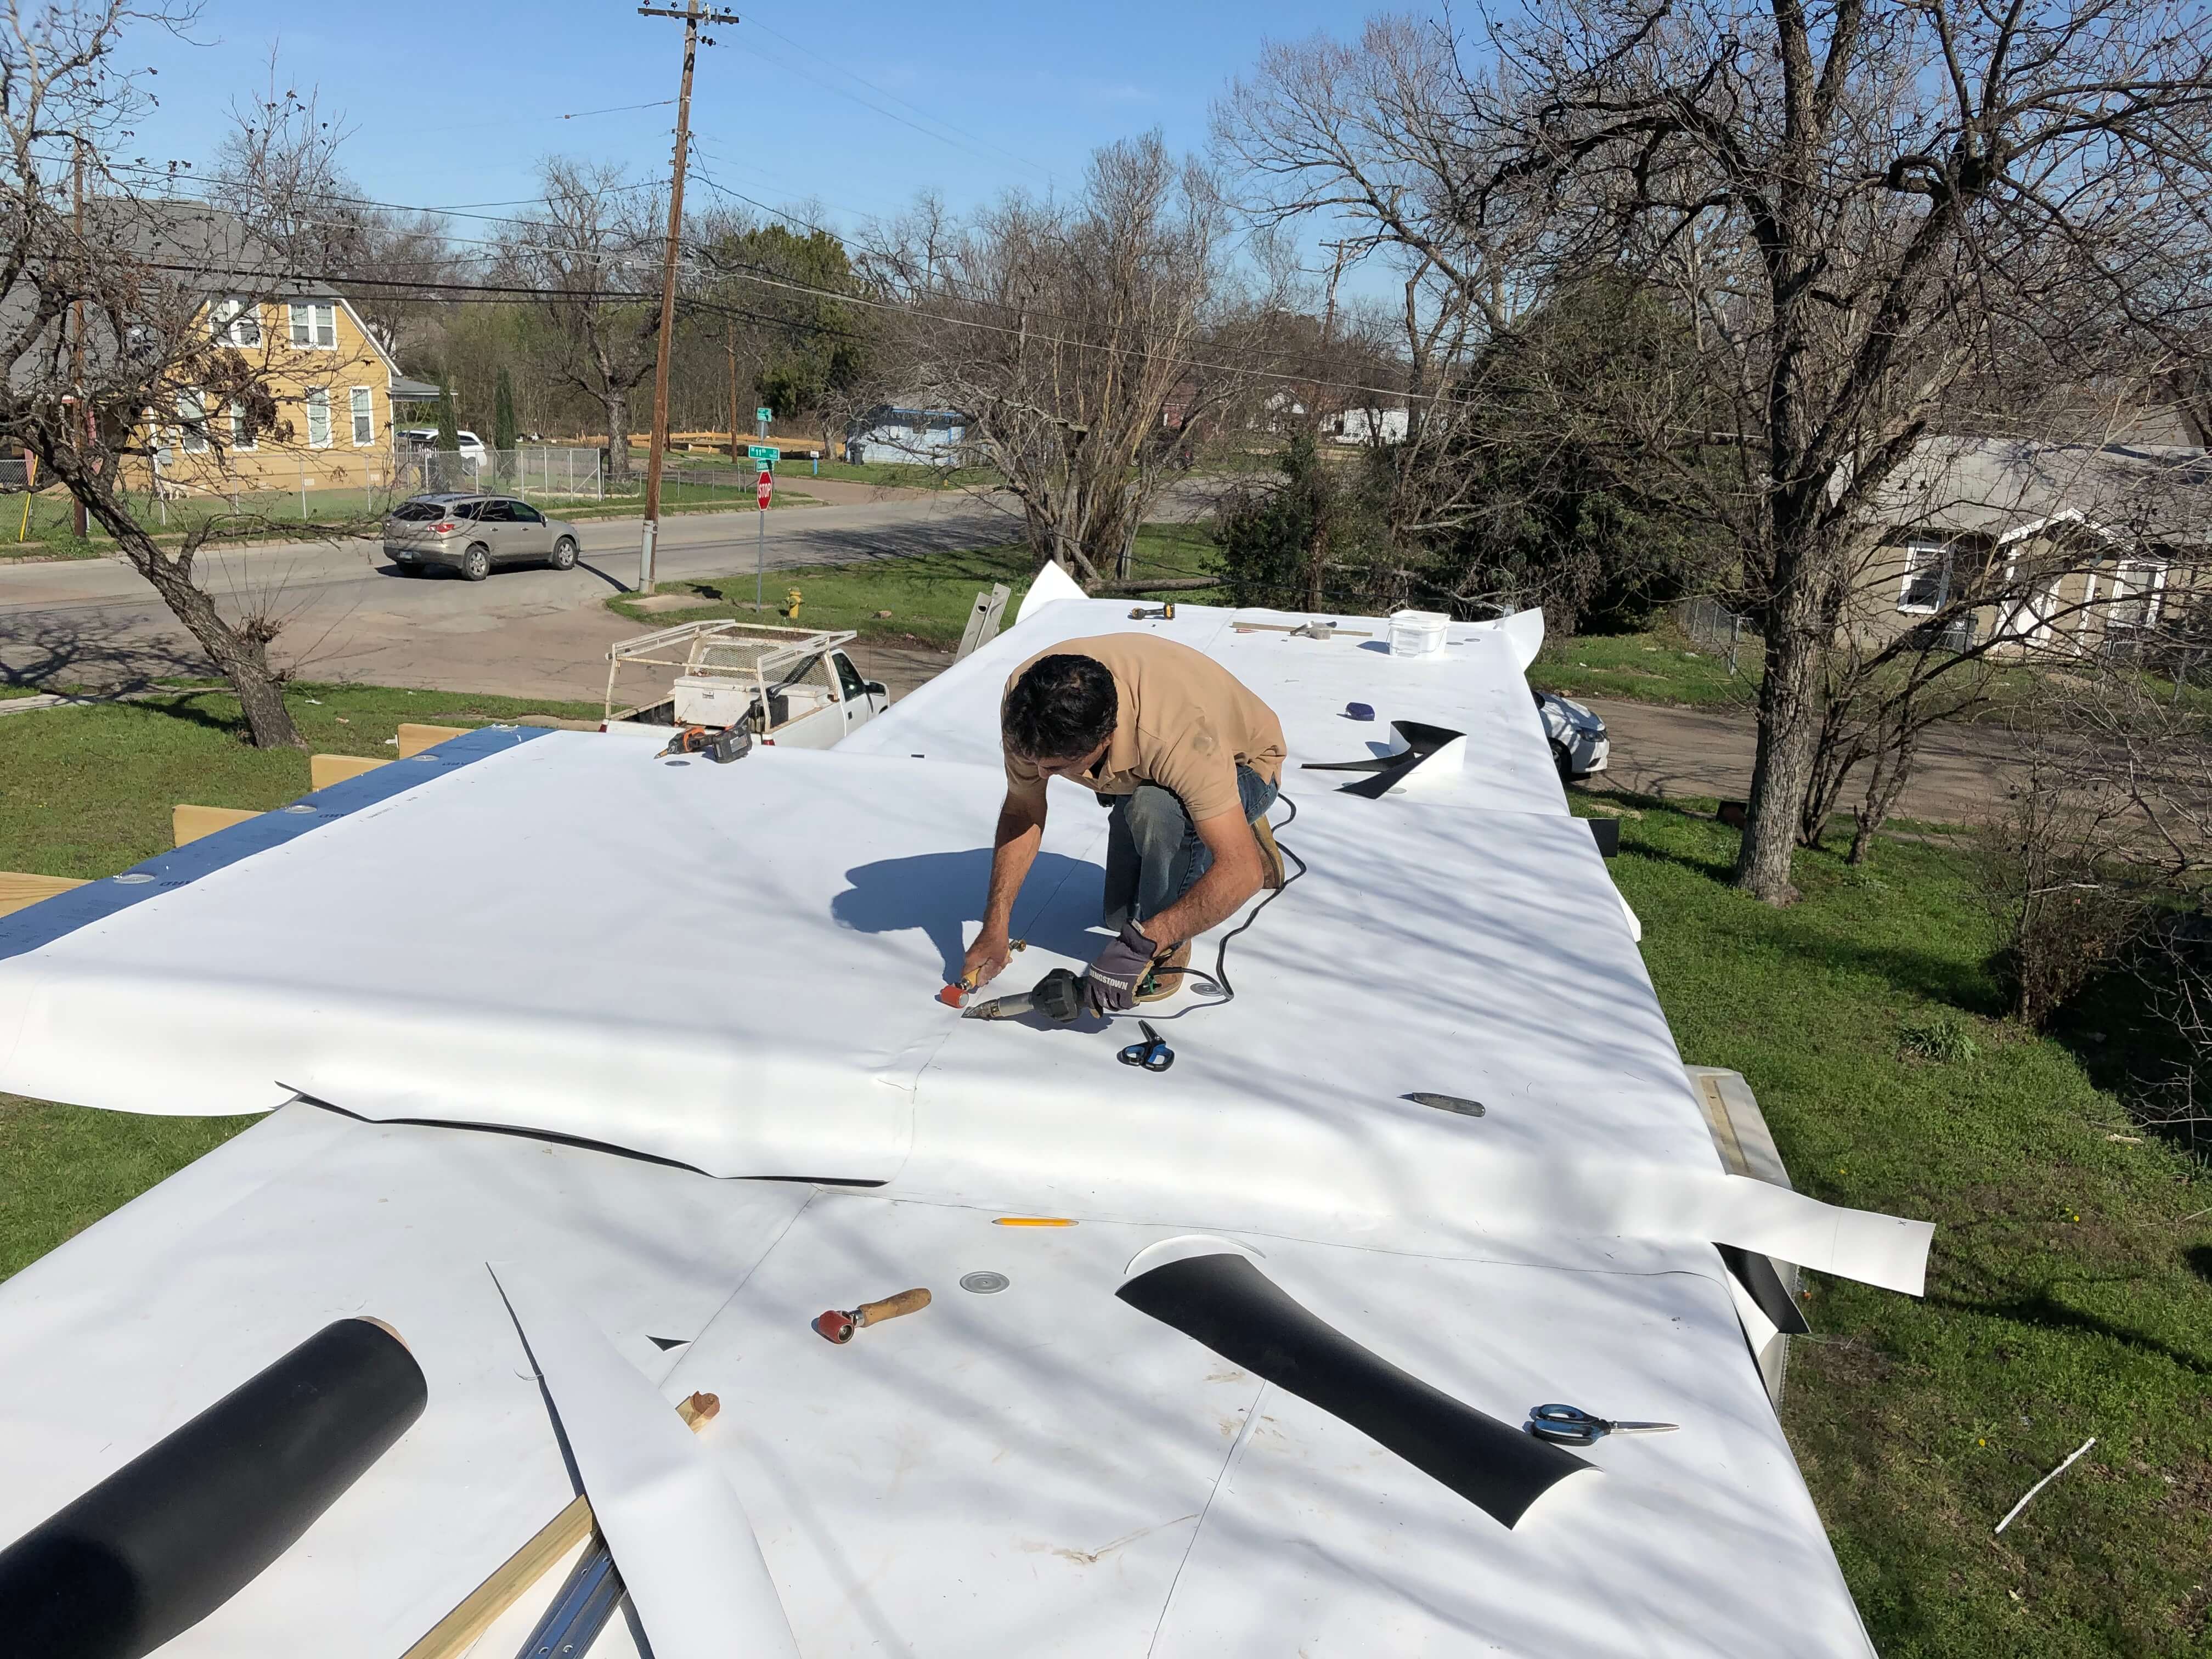
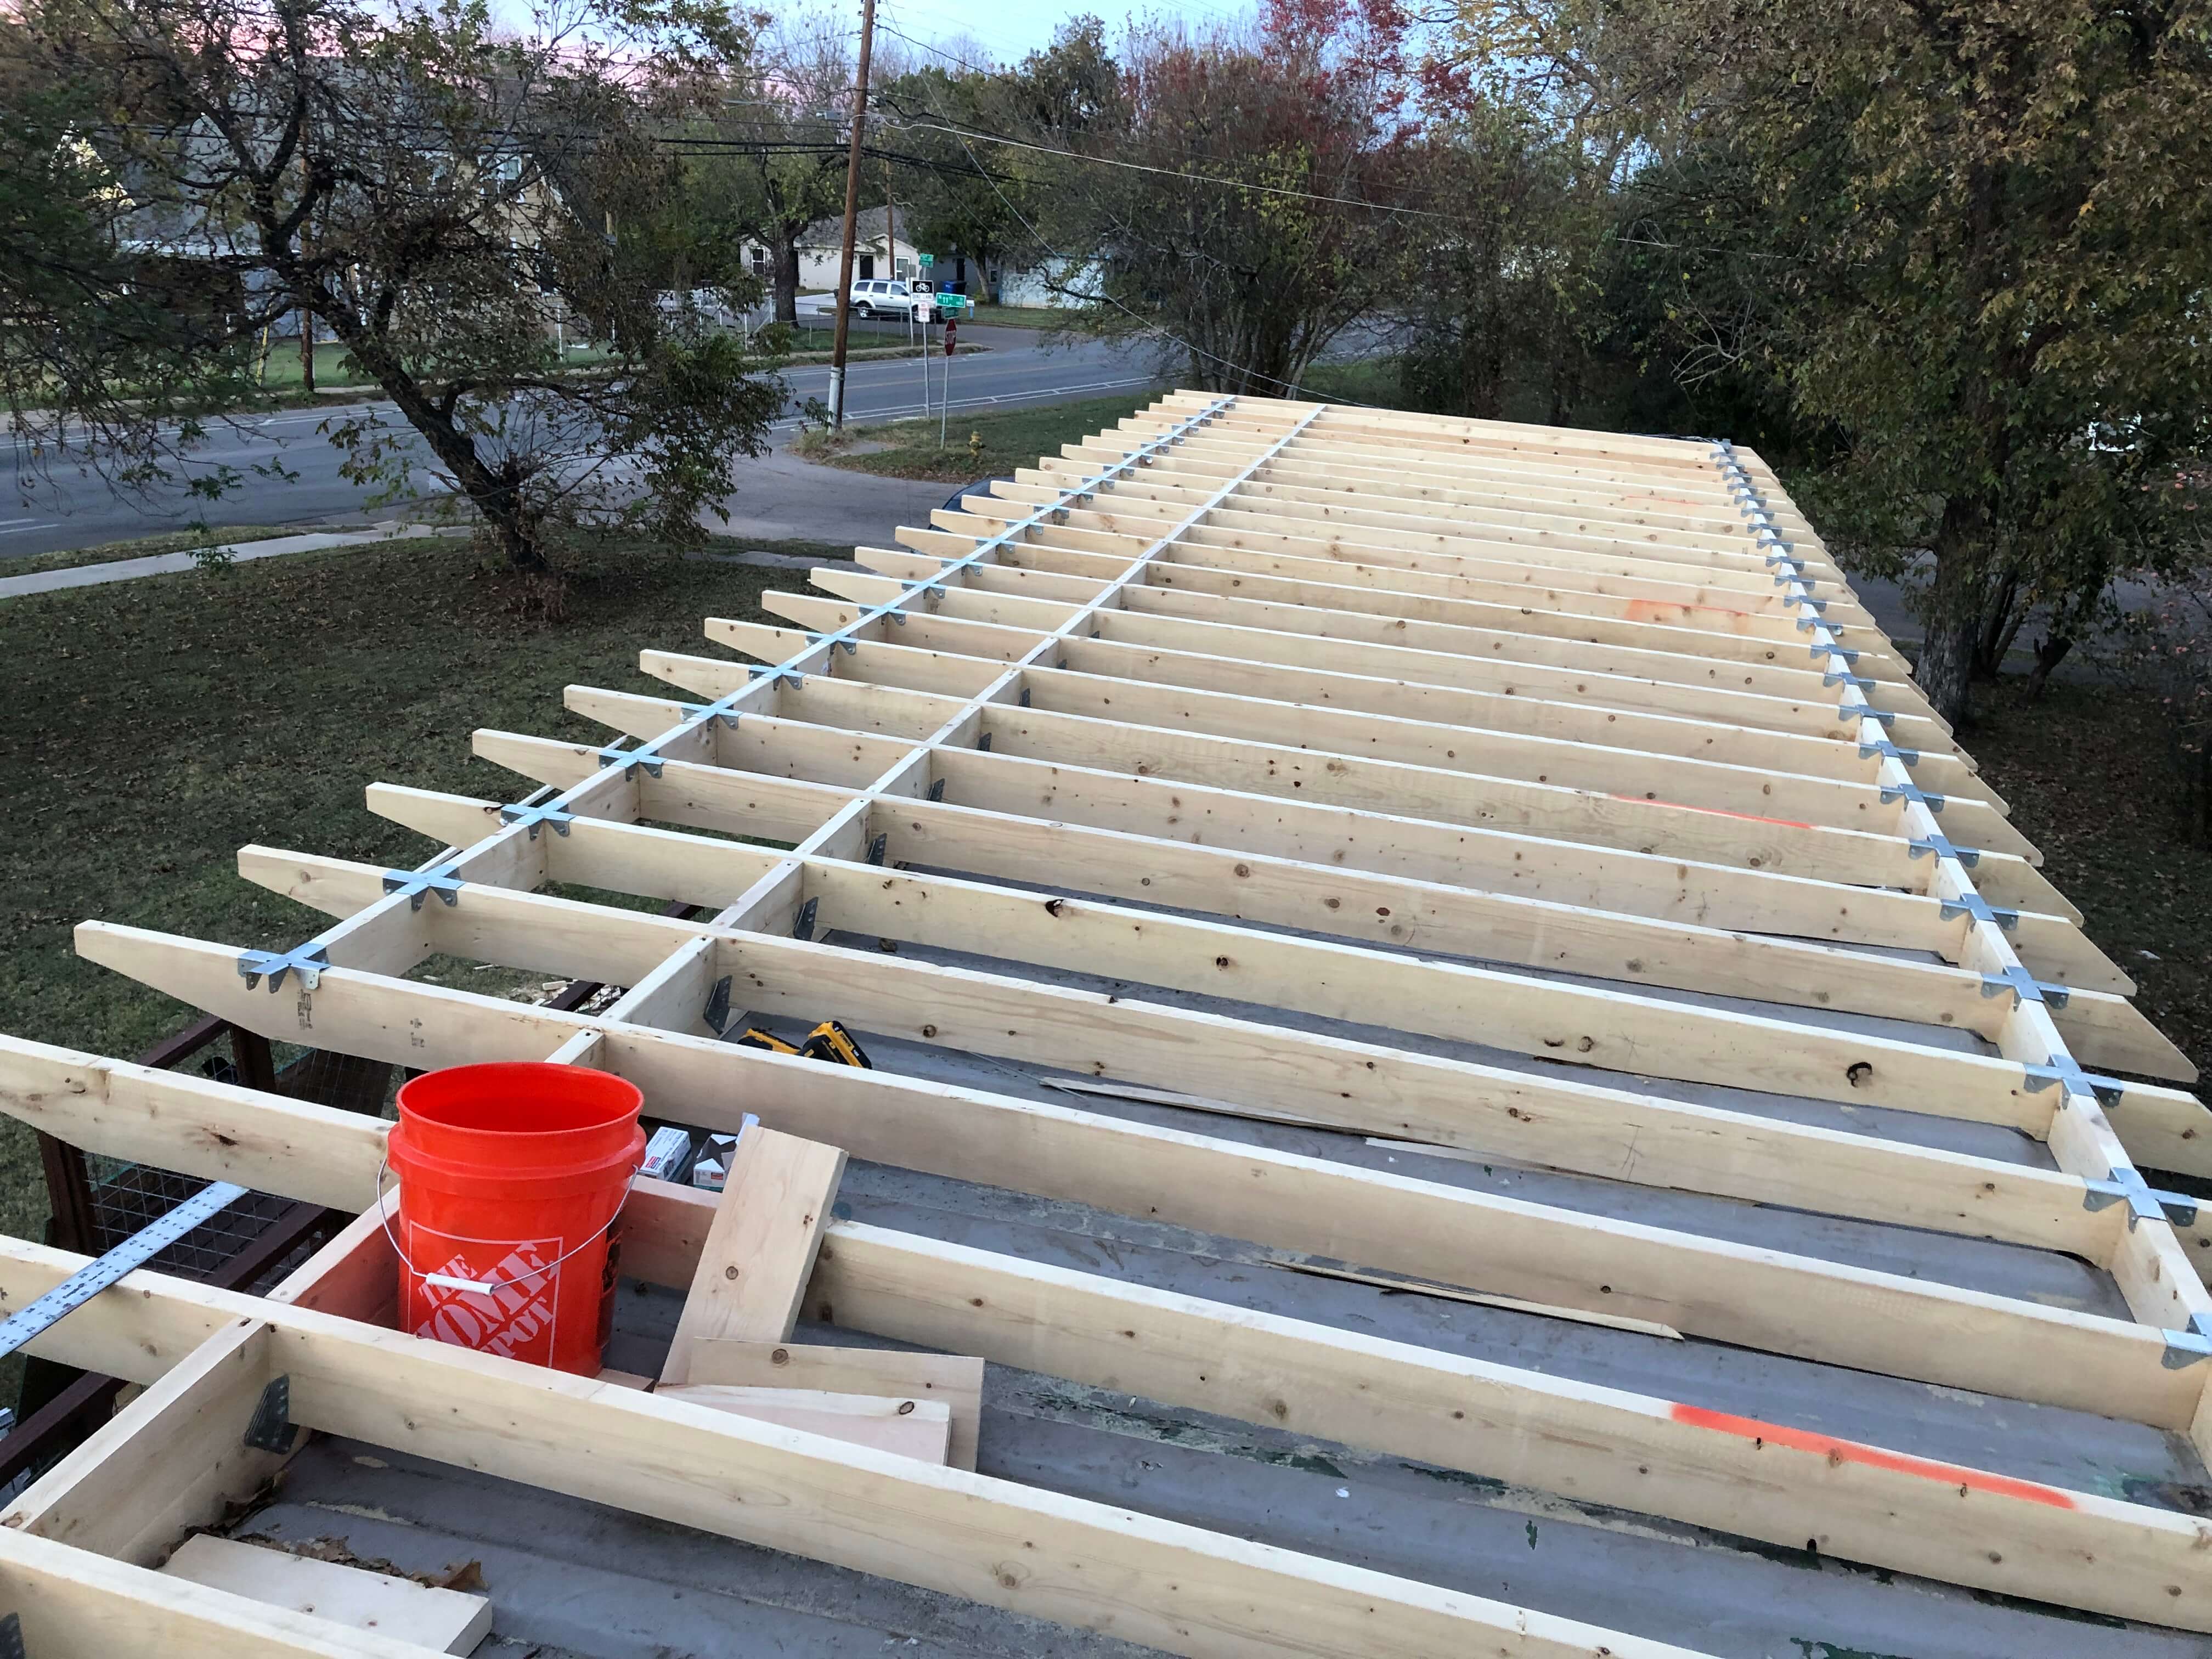
Roof
When I built my container house in 2018-2019, I bought a used box for $3,000. As it turned out, the box was pretty banged up,
including the roof. While we were working on construction, we noticed it had multiple leaks when it would rain. You may be able
to afford to buy a new box which would almost certainly not have a leaky roof, but even in 2018 that was going to cost me twice
as much, and it still doesn't address the challenges with windows and doors (see above).
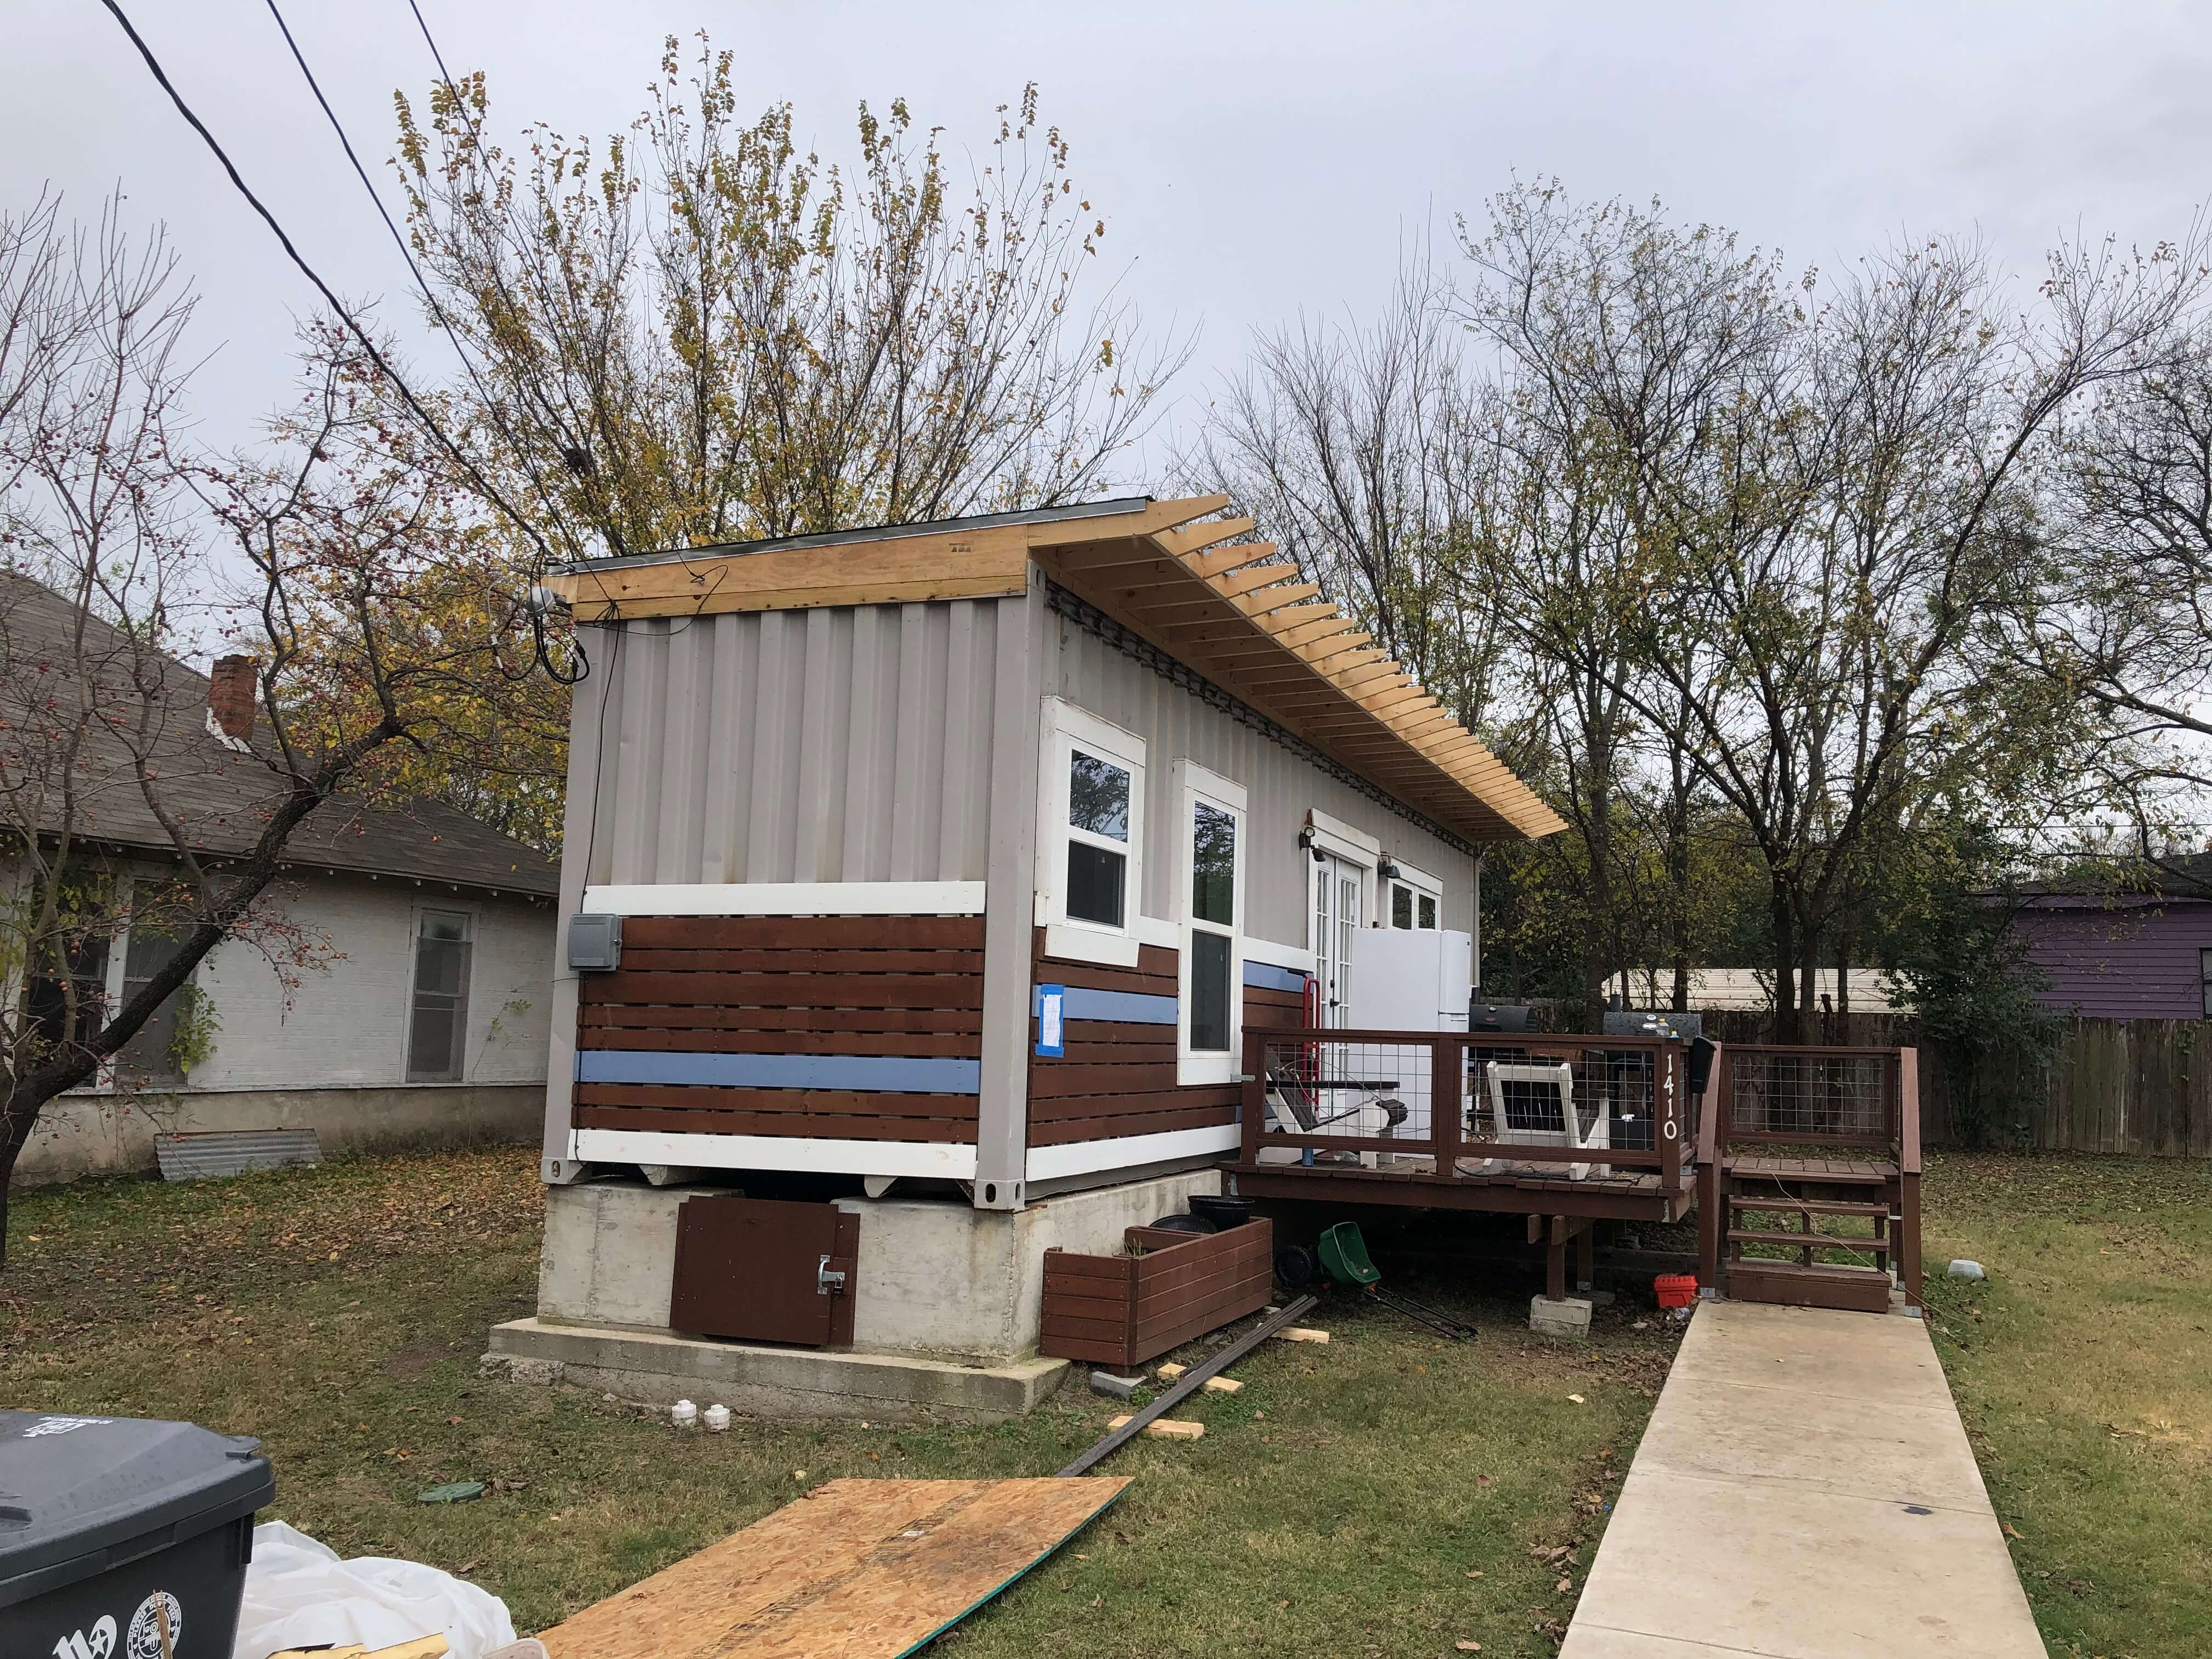
The way things went with my build, I put a TPO roof over the container which kept the rain from leaking through the top. After the first year of struggling with the windows, I wound up tearing it all off and building a roof that had a 2ft overhang in the front and a 1ft overhang in the back.
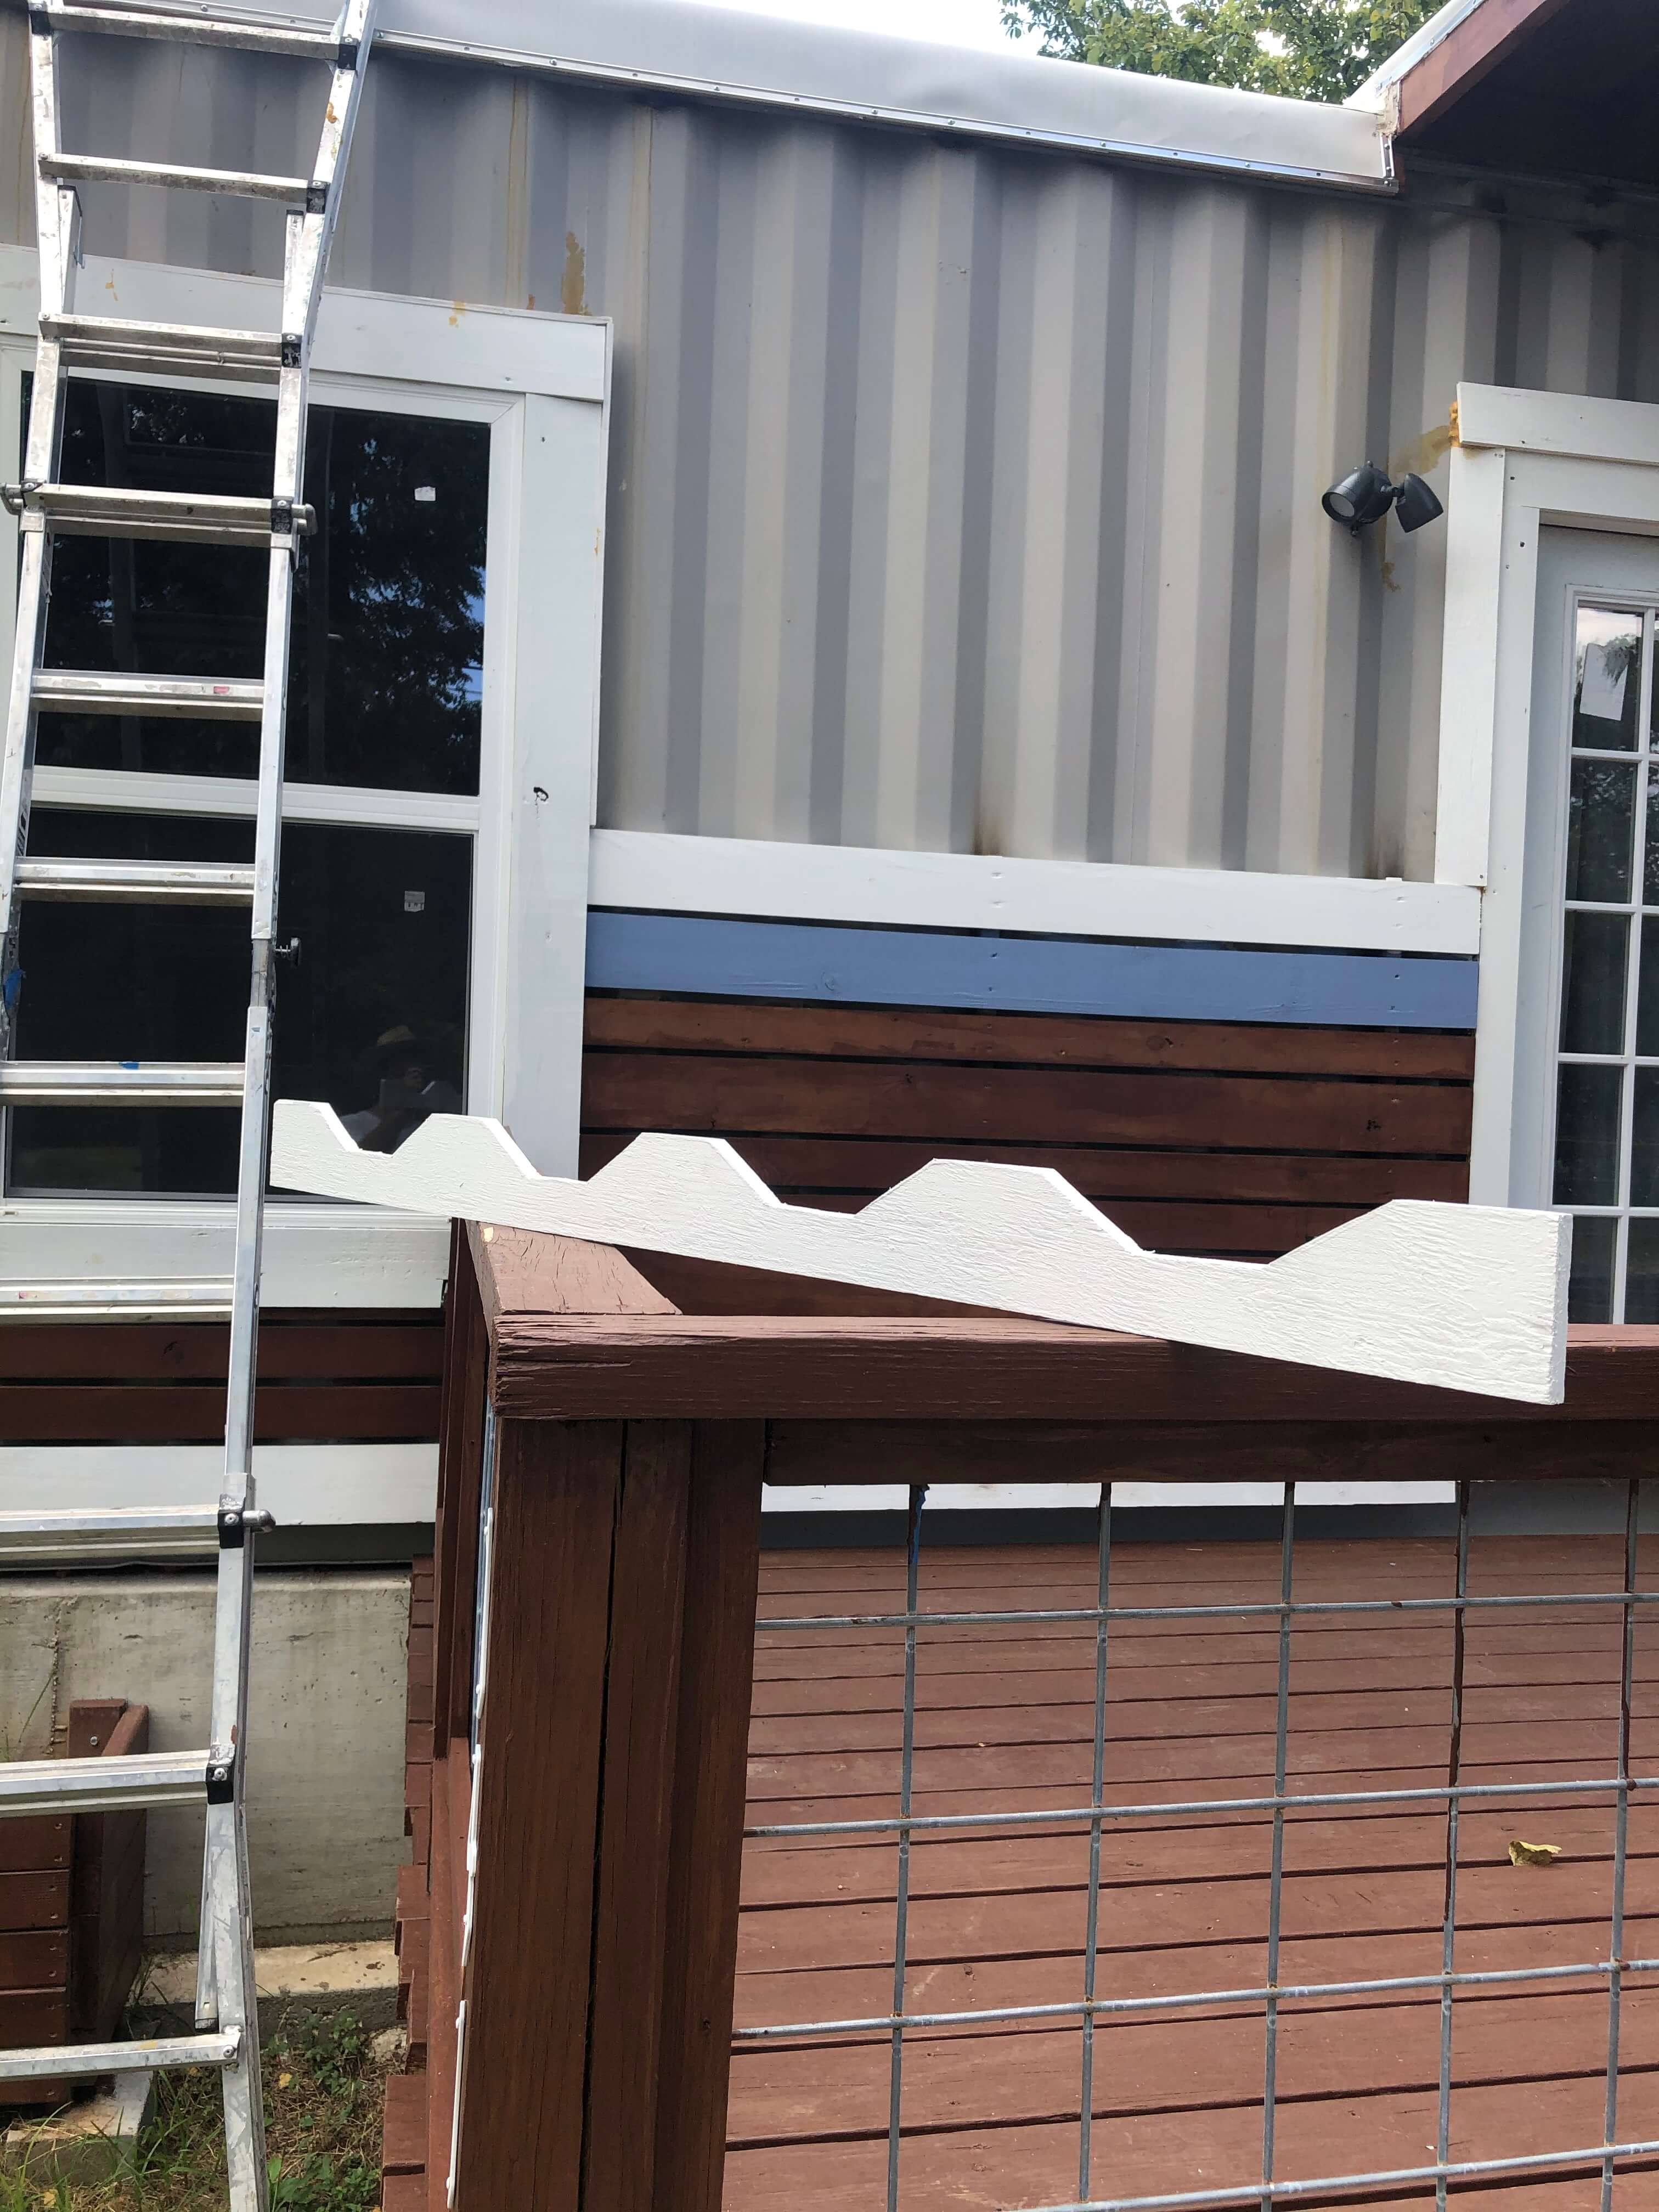
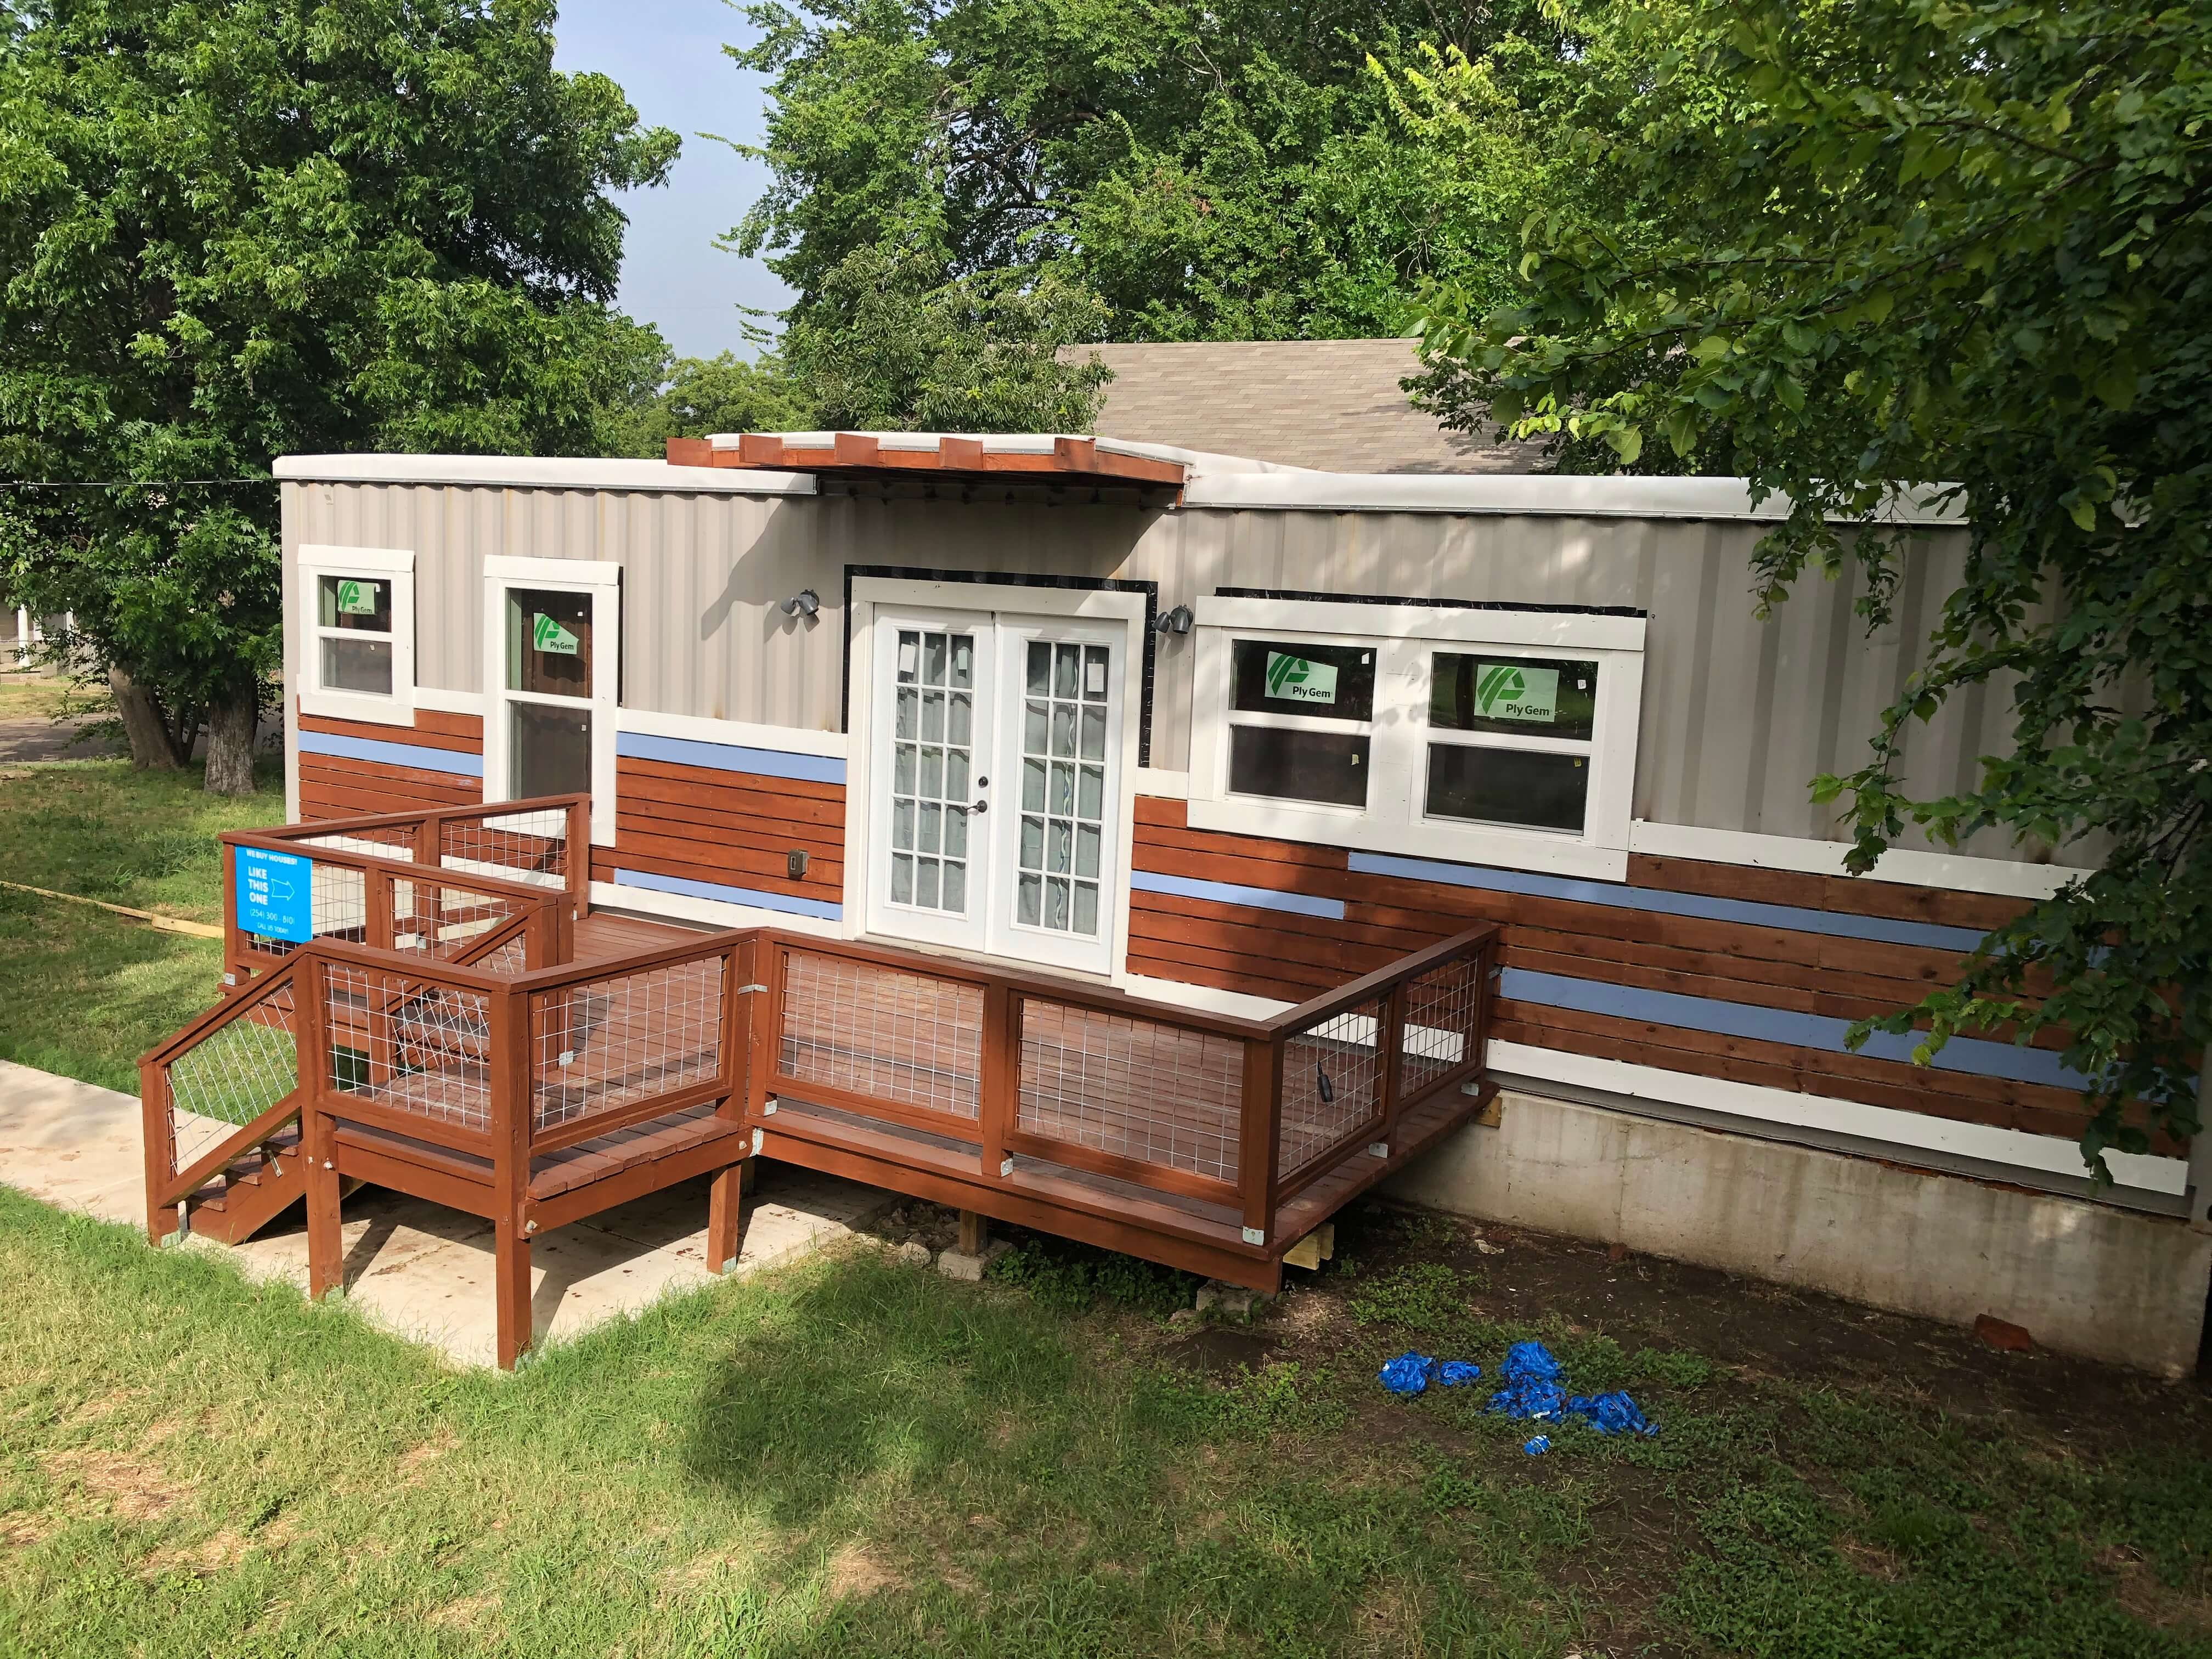
Siding
You could be locating your container house out in the woods, in which case your neighbor's aesthetic tastes might not come into
play, but I happend to build mine on a somewhat high visibility street in the middle of town. After I poured the foundation and
placed the box on top of it, I immediately painted it gray, making it look like one of the Stonehenge pillars if it tipped over
on its side. Next thing I know I'm getting calls from the City Planning department asking for an in person meeting. I never did
find out *who* was raising a ruckus, but they apparently had some pull. Planning / Code Enforcement said my final occupancy permit
had a "hold" on it until I made the house blend in with the surrounding neighborhood (I had to guess that they didn't intend that
to mean painting the entire house purple like my next door neighbor on one side, or looking like an anbandoned crack house like the
neighbor on the other side).
What I ended up doing was mounting horizontal 1x4 and 1x6 boards to create the appearance of wood siding. To do this, I had to weld (more welding!) brackets on the metal walls of the box, and then I could screw the wood into the brackets. I could have screwed the wood directly into the corrugated metal, but I didn't want to make more holes in it.